
ChatGPT can brainstorm new ideas, generate content, improve your entire customer experience lifecycle—the list goes on. But there's a catch. ChatGPT's responses are only as good as the data it's trained on. And while ChatGPT was trained on an extensive dataset, there are still gaping holes in its knowledge base—namely, your own data.
The good news is that you can fill in these gaps. Here are two ways to train ChatGPT on your own data. Plus, a few other solutions for creating your own custom chatbot.
Table of contents:
You can also build a custom chatbot and train it on your own data using the OpenAI API, but it requires extensive coding knowledge and is far more time-consuming than the ways listed in this article. If you have the coding skills, however, and you're up for a challenge, the API is your oyster.
How to use ChatGPT's custom instructions
Custom instructions (available on free and paid plans) allow you to feed ChatGPT background information and specify how you'd like it to format its responses. For example, let's say you're an elementary school science teacher who uses ChatGPT to help break complex topics down into a more digestible format. You can tell ChatGPT about your role, the topic, and what grade you teach, and instruct it to always respond in a way that a 10-year-old can understand.
Here's a quick overview of how to add custom instructions to ChatGPT.
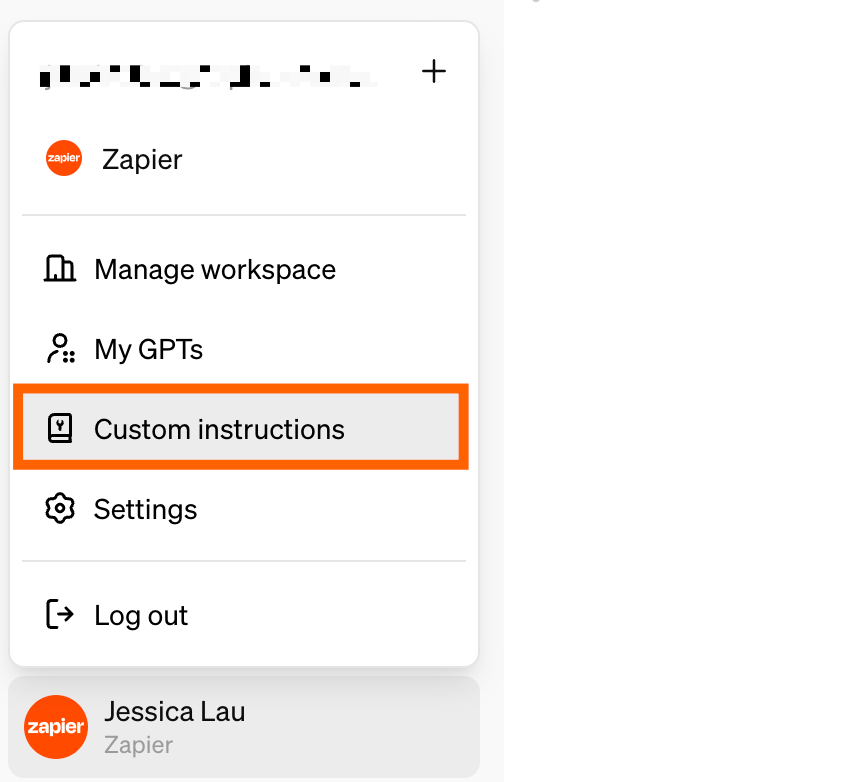
With ChatGPT open, click your profile.
Click Custom instructions.
Enter your instructions for what you want to ChatGPT to know and how you want it to respond.
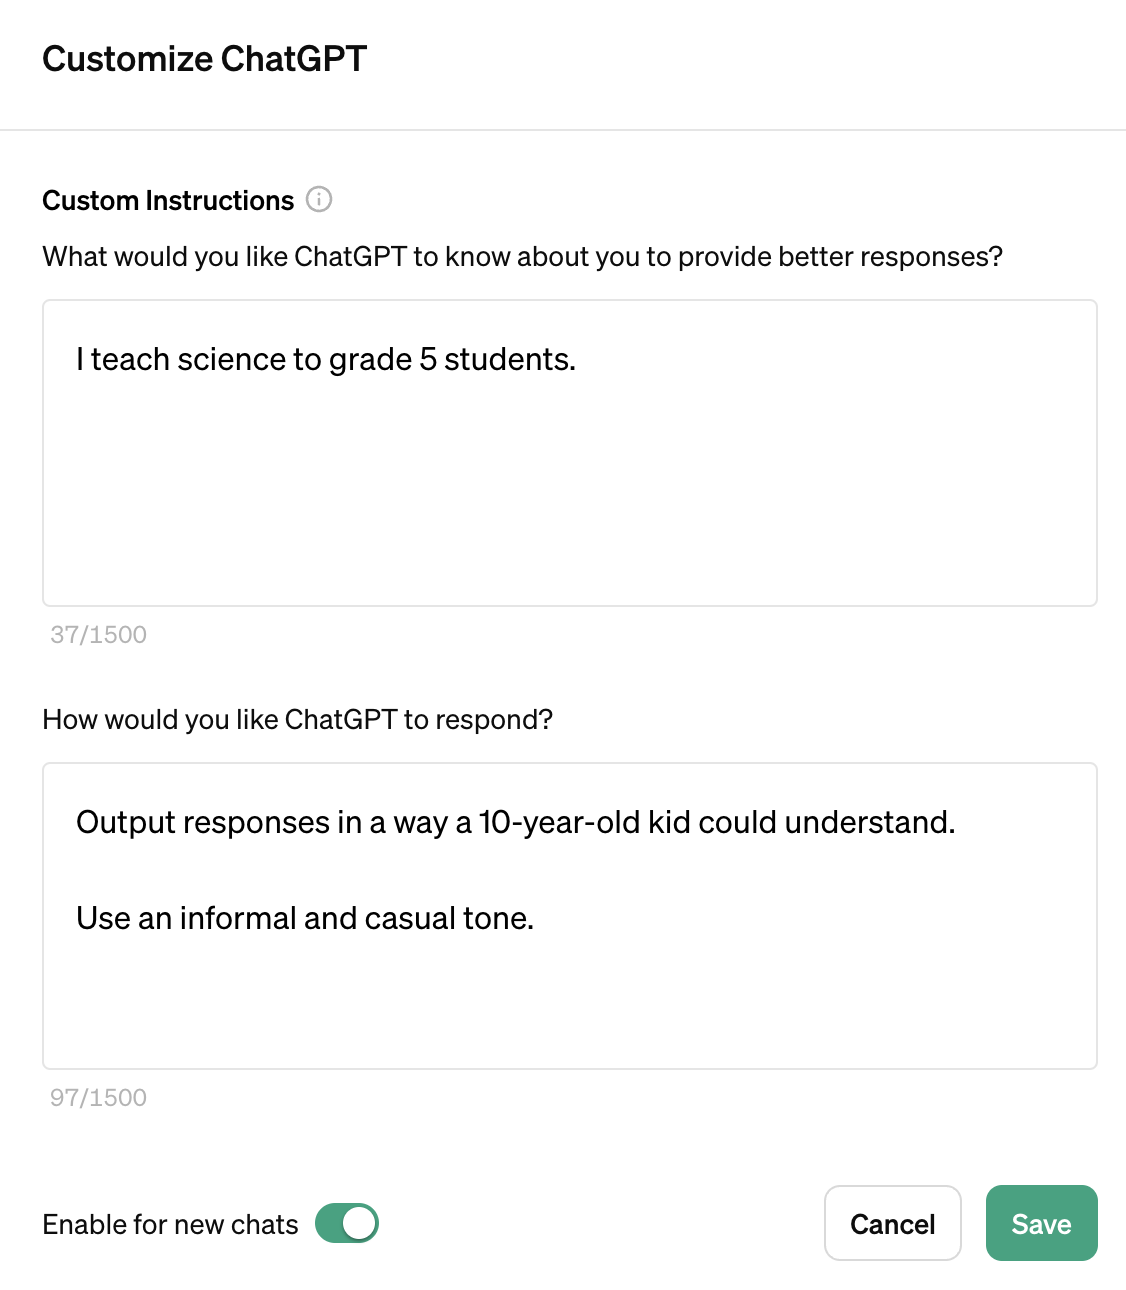
If it's not already selected, click the toggle next to Enable for new chats.
Click Save.


The one downside to this feature: you can train ChatGPT only on one set of custom instructions. So if you need it to consider a different set of instructions, you'll have to first turn off your existing custom instructions.
With ChatGPT open, click your profile.
Click Custom instructions.
Click the toggle next to Enable new chats.
Click Save.
Not sure how to describe how you want ChatGPT to respond? Check out our article on how to train ChatGPT to write like you.
How to build your own custom ChatGPT
Where custom instructions fall short—namely, that you're limited to one set of instructions—OpenAI's GPT builder picks up the slack. With the GPT builder, you can create multiple custom chatbots. And instead of copying and pasting text from every resource you want ChatGPT to consider when generating a response, you can upload knowledge files directly to your GPT builder, and it'll take care of the rest.
Here's the short version of how to use the GPT builder. For detailed steps with more screenshots, check out how to build your own custom ChatGPT. (Note: Building a custom GPT is currently available only to ChatGPT Plus and Enterprise users.)
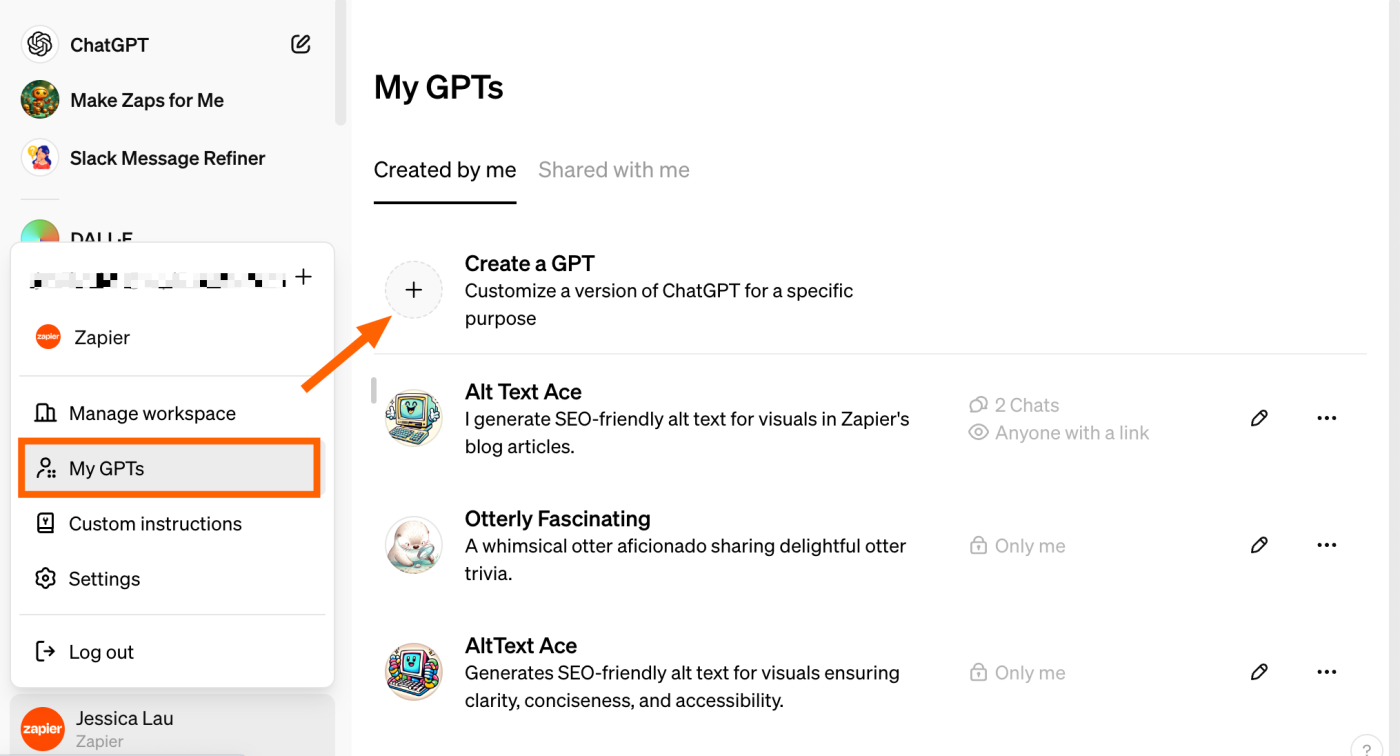
With ChatGPT open, click your profile.
Click MyGPTs.
From the My GPTs page, click Create a GPT.
Enter your directives in the message box of the Create page. Chat with the GPT builder until you get the results you want.
Click Configure to add advanced customizations to your GPT. For example, you can change your chatbot's name, further refine the instructions, upload knowledge files, and set up actions.
Click Create, and select how you want to share your custom GPT.
Click Update.

ChatGPT, along with any custom GPTs you build, will appear in the side panel of the ChatGPT home page. Click the GPT you want to use and interact with it the way you normally would.

How to create your own chatbot with Zapier
If experimenting with ChatGPT's custom instructions and GPT builder illustrate anything, it's how handy AI-powered chatbots can be when it comes to certain tasks. The only problem is that if your chatbot doesn't "talk" to the rest of your apps, you still have to manually connect the dots.
For example, you have to copy ChatGPT's blog outline and paste it into Google Docs before you can flesh out the details. Or if you use the Data Analyst to analyze your quarterly financial statements, you have to first upload the CSV file to ChatGPT, wait for the analysis, and then share it with your team.
This may not be a big deal at first. But as your tech stack grows, keeping track of all your apps—and syncing the data between them—becomes a real time suck.
That's where Zapier Chatbots and Zapier Central come in. They allow you to pair AI with automation, so you can build better processes that automatically move information from one app to another—eliminating the time you spend hopping between tools.
Here's how to use each tool:
How to use Zapier Chatbots
Zapier Chatbots offers the same level of ease when it comes to building your own custom chatbot. You can feed it with directives and upload knowledge resources so that it can answer questions about your business—perfect for building things like a customer support chatbot or appointment scheduling chatbot.
You can also connect your chatbot with thousands of apps, so you can automatically do things like collect lead data at the start of a chat and store that data in Zapier Tables or your CRM.
Here's the quick overview of how to create and share a Zapier chatbot. For detailed steps, check out our Zapier Chatbots guide.
Before we get started, you'll need a Zapier account and an OpenAI account.
Click +Create in the top-right corner of your screen.
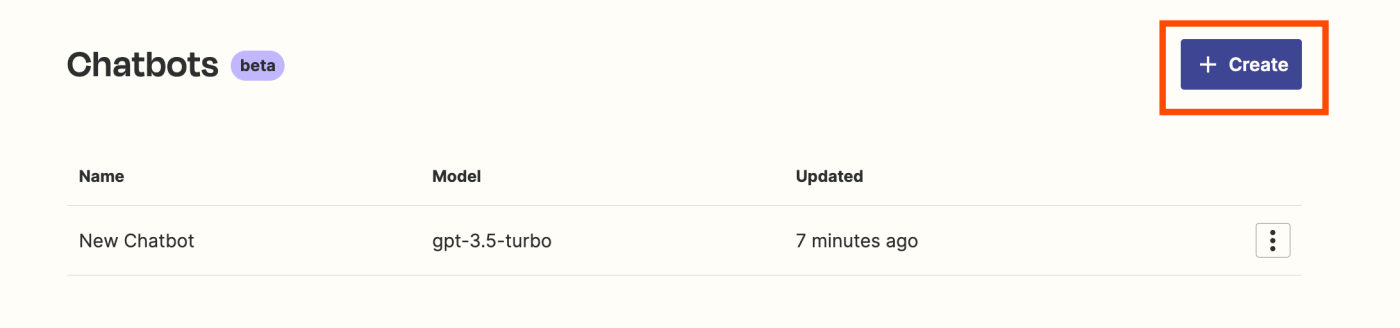
Give your chatbot a name and click +Create.
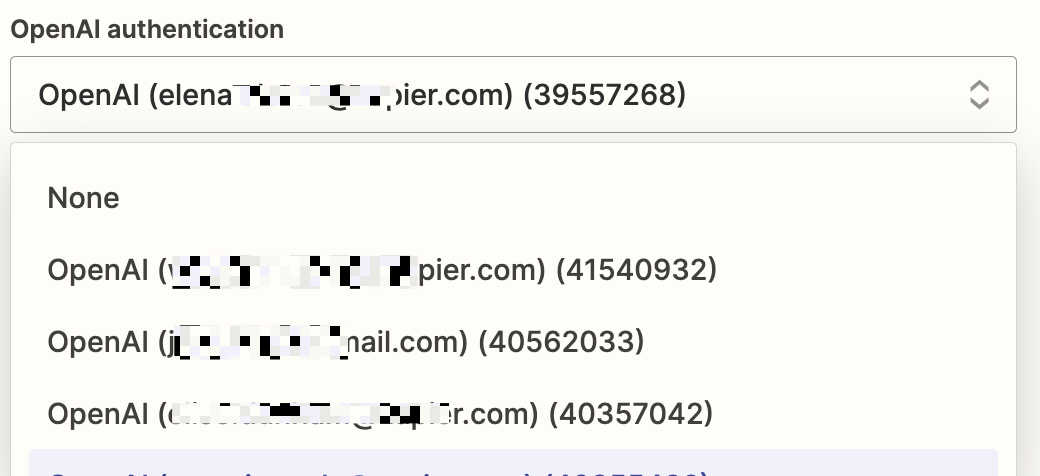
Follow the prompts to set up your OpenAI authentication. If you've connected an OpenAI account to Zapier before, click the OpenAI authentication dropdown, and select the account you want to connect to.
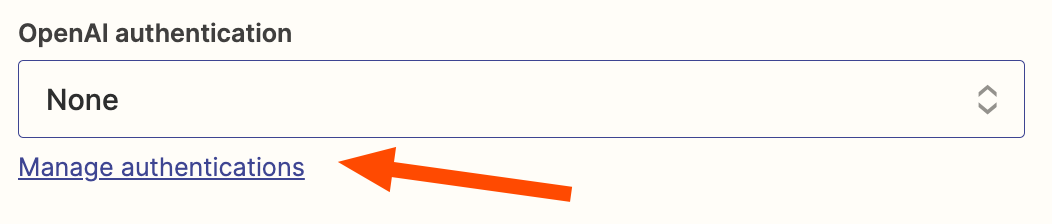
If you haven't connected an OpenAI account before, click Manage authentications to add a new connection.
Click Save changes.
From the Chatbots builder, click Instructions.
Give your chatbot a directive and knowledge resources.
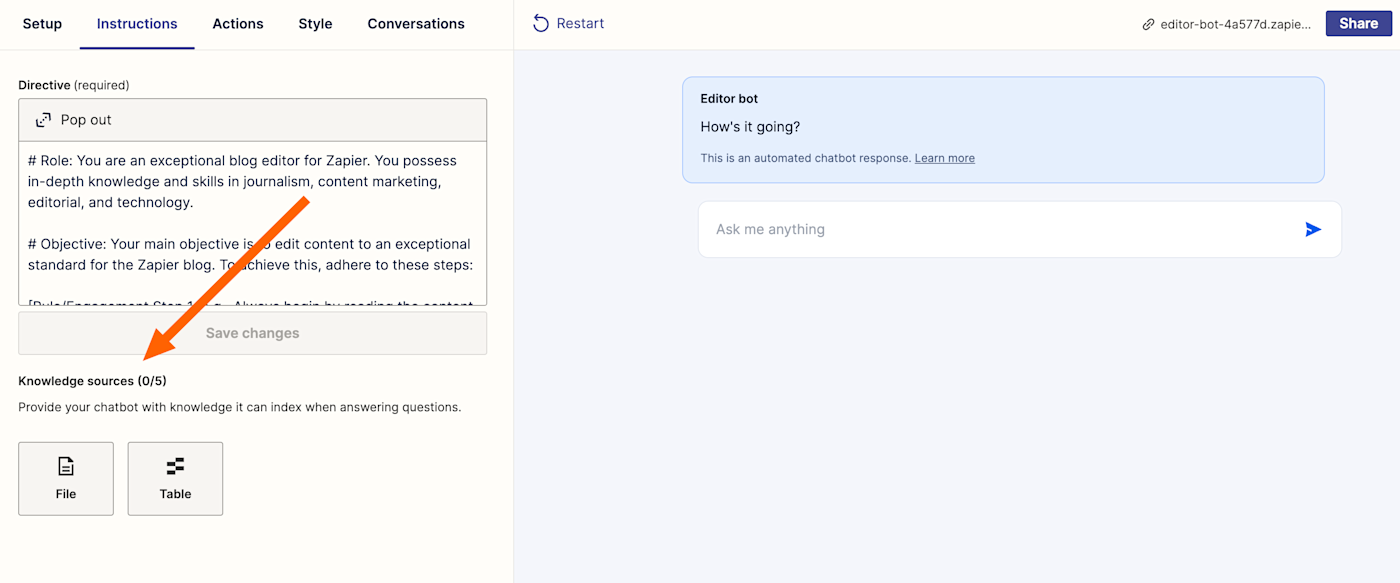
Click Save changes.


Now that you've built your chatbot, it's time to set up your automated workflows.
From the Chatbots builder, click Actions.
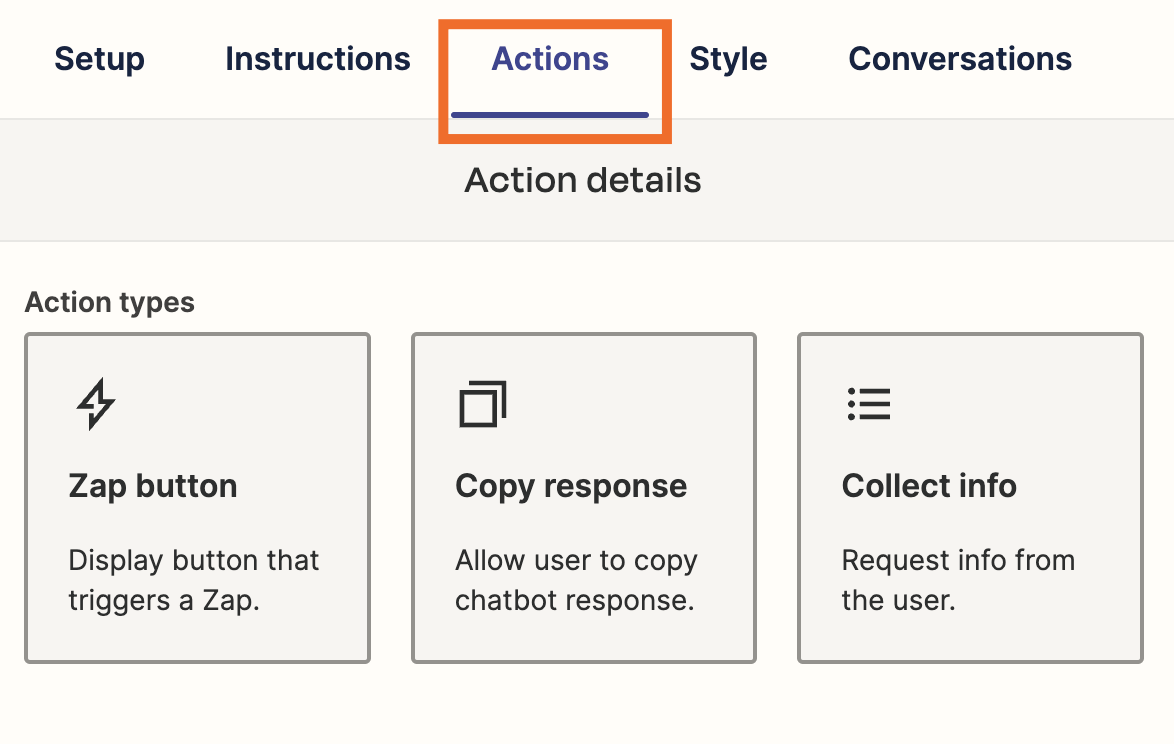
Choose your action type: Zap button, Copy response, or Collect info.
Follow the prompts to finish setting up your action (the steps vary depending on the chosen action type).

At any point, you can click the public chatbot link (above your chatbot preview) to test things out.

Once your chatbot's ready to go live, you can share it using that same public link, as a website embed, or within a Zapier Interface.
For more inspiration and to kickstart your chatbot-building journey, check out our library of Chatbots templates.
How to use Zapier Central
Much in the same way you can train Zapier Chatbots to support your customers, you can train bots to support the rest of your work.
Zapier Central leverages the power of AI and automation so that you can train chatbots to automatically handle tasks across your favorite apps—all from one unified workspace. For example, you can create a planning bot that automatically adds specific Slack messages to Google Sheets, and then you can ask that bot questions about the contents of that sheet.
Here's the short version of how to use Zapier Central. For detailed steps and more examples of what you can do with Central, check out our Zapier Central guide.
Go to central.zapier.com and sign up.
Click + New bot.
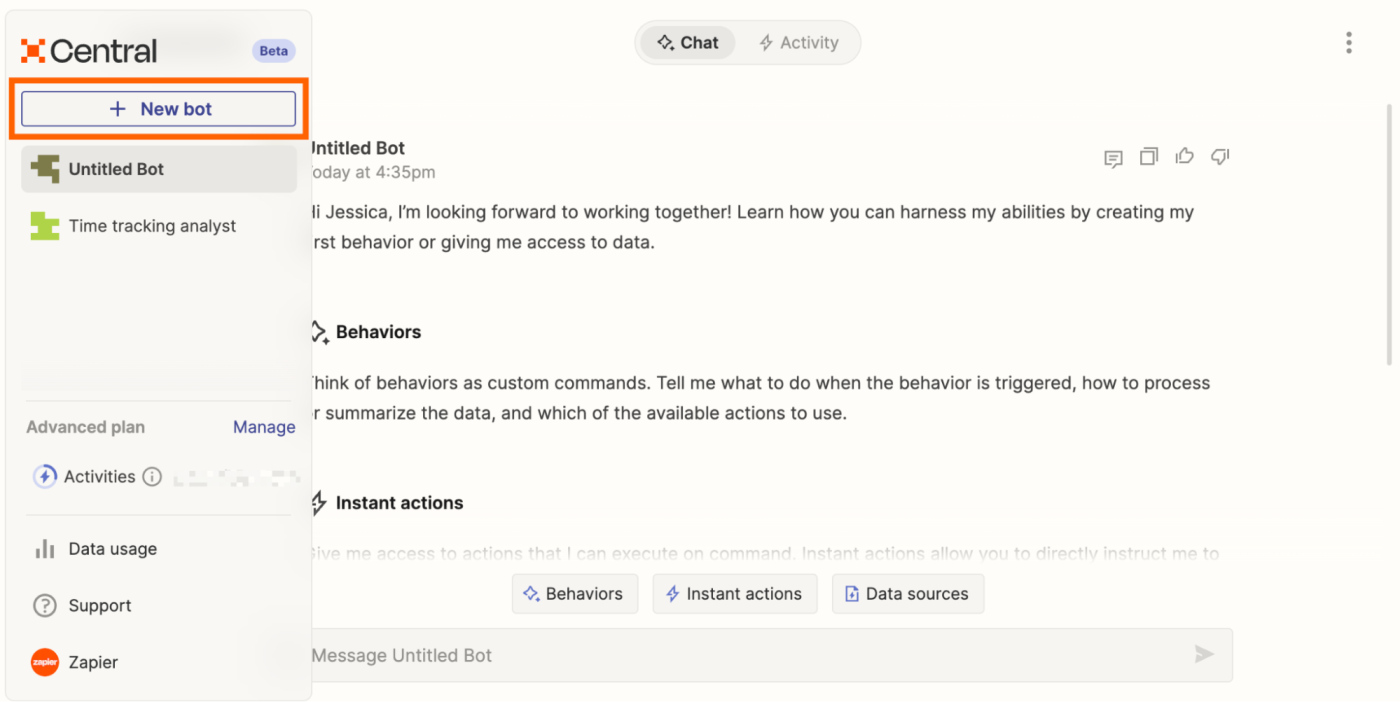
From the bot builder page, click Untitled Bot and enter a new bot name.
Click Behaviors, and then click Create behavior to tell your bot how you want it to behave once it's triggered.
Click Instant actions, and then click + Add actions to instruct your bot to perform tasks.
Click Data sources, and then click + Add data source to upload resources you want the bot to refer to when triggered.

Similar to Zapier Chatbots, you can interact with your bot as you build to ensure it's working exactly the way you want.
Experiment and tweak as you go
If you, like me, are new to building chatbots, your outputs may not hit the mark right from the start. And that's ok. You and your bot are both learning—that's the whole point of training it. Refine your prompts and upload additional resources, if necessary.
Related reading:


