The beauty of automated workflows is that they run without your involvement: When this event happens in one app, automatically do this thing in another app. But sometimes you only need some of what happens in that first app to make something happen elsewhere.
Every Zap—the automated workflows you create with Zapier—has rules to follow. In a simple, two-step Zap, the rules are: when my trigger event happens, perform my action event.
But what if you need more control over the actions that follow?
With Filter by Zapier, you can ensure your Zaps run according to criteria you set—whether that's filtering out errors or only passing through the highest-value leads. If new information doesn't meet specified conditions, your Zap won't continue.
This guide will walk you through how to use filters in your automated workflows, including the types of conditions you can set for your Zaps and creative uses for filters.
Zapier is the leader in workflow automation—integrating with 6,000+ apps from partners like Google, Salesforce, and Microsoft. Use interfaces, data tables, and logic to build secure, automated systems for your business-critical workflows across your organization's technology stack. Learn more.
What you'll find in this guide:
Using Filter by Zapier requires a multi-step Zap, which means you'll either need to be in your trial period or have a paid account to set it up.
What is Filter by Zapier?
Every Zap needs a trigger, but triggers tend to be pretty broad. For example, a "new lead" or a "new email."
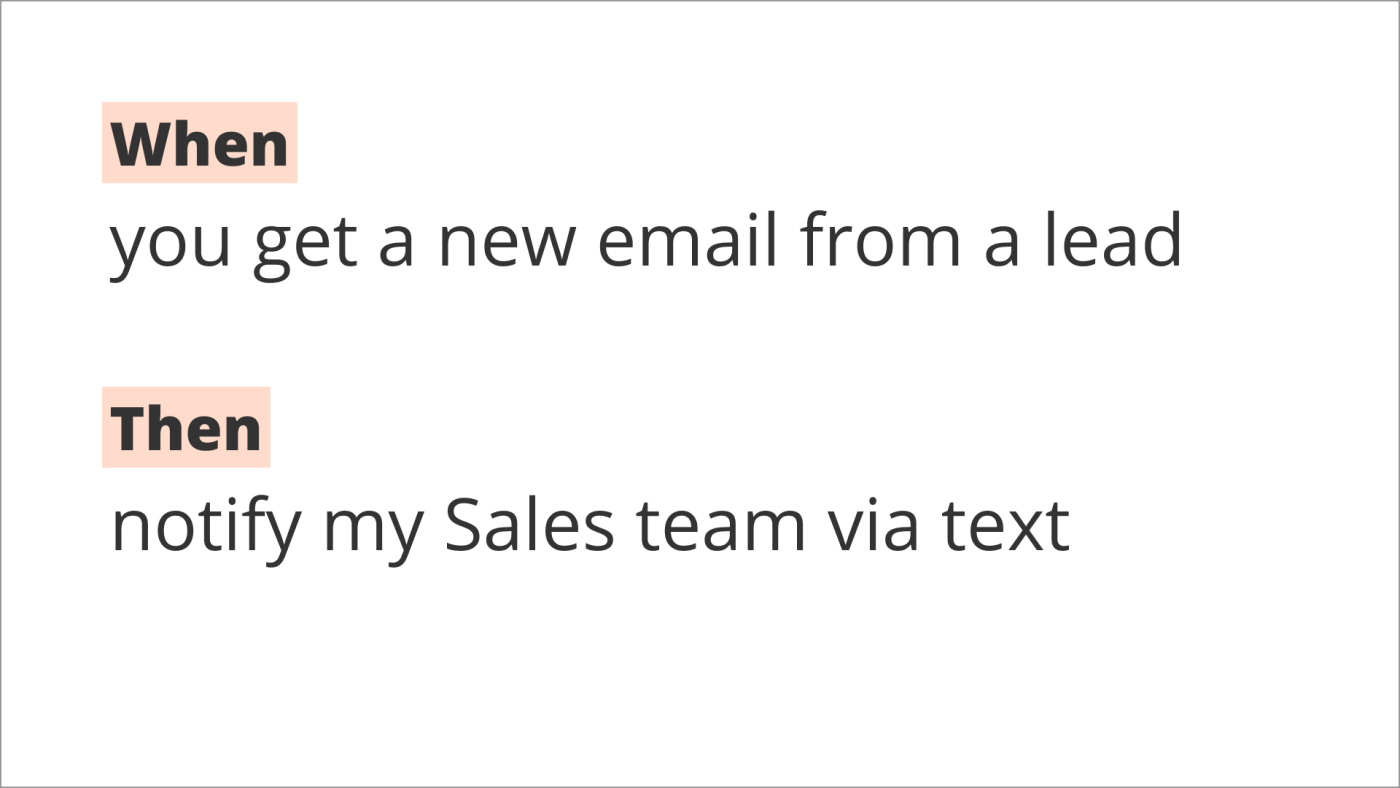
Every Zap follows the same structure: When this happens, do that.
But let's say you only want your Zap to run when you receive a new lead who lives in Austin, Texas. That's where filters come in.
Filter by Zapier allows you to set up rules for your Zaps, so they only continue if they absolutely have to. When the filter's conditions don't match, the Zap will not proceed.
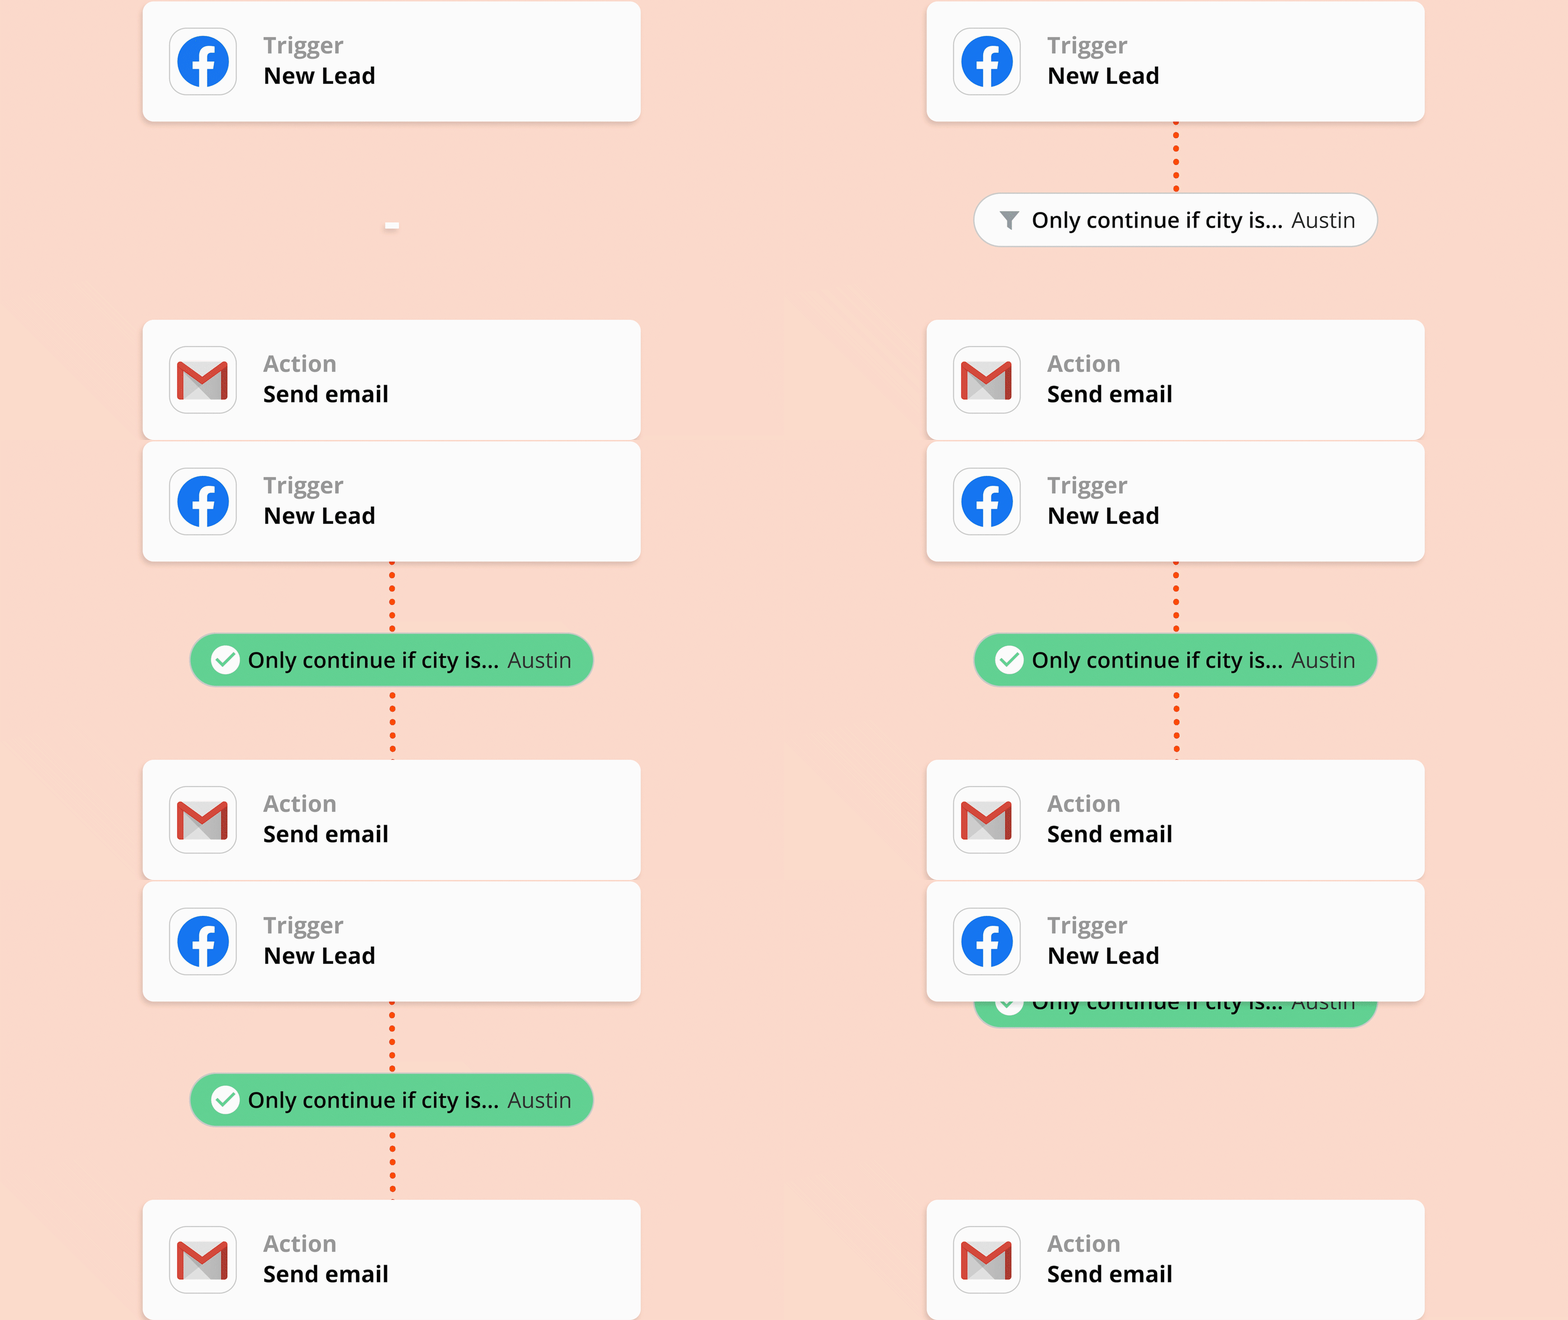
What can you filter? Anything. As long as your app provides the data, Filter by Zapier can use it.
You can add a filter at any point in your Zap after your trigger. You can also have multiple filters in a single Zap.
Using a filter can also reduce your task usage. Any action your Zap completes counts as a task, and Zapier plans have a monthly task limit. If something doesn't pass your filter, Zapier doesn't count it against your task usage. So using filters is a great way to cut down on the number of tasks your Zaps use.
Filters are optional, so you don't always need them for Zaps. But when you're getting too much information and need something more specific, you can think of filters like traffic controllers for your Zaps.
In Zaps that have a filter step, the order of steps matters. Any actions added to the Zap after the filter step will only be performed if the incoming data meets the filter's conditions.
Available filter conditions
Filters can use different rules or conditions to determine whether a Zap can proceed. When setting up a filter, you're telling Zapier to check a specific field in a prior step to see if it follows your rule.
These conditions will only work for the type of information specified in parentheses. For example, if you choose (Text) Contains as you're setting up a filter, that means you will be checking the text of the field on which you're applying the filter.
There are five types of filter rules: text, number, date/time, boolean, and generic.
Text conditions
Text conditions are rules that can be used to check the text within a field in a Zap. For example, if I want to filter new RSS entries by a specific author, I can use a condition such as (Text) contains to filter for a specific name.
The following are conditions you can use for text fields. You have plenty of options to choose from:
Condition | What it means | Case sensitive? |
|---|---|---|
Contains | Checks if the field contains a value | No |
Does not contain | Checks that the field does not contain a value | No |
Exactly matches | Checks if the field matches a value letter-for-letter | No |
Does not exactly match | Checks if the field does not match a value letter-for-letter | No |
Is in | Checks if a field is within a list of values | No |
Is not in | Checks if a field is not in a list of values | No |
Starts with | Checks if a field begins with a certain value | No |
Does not start with | Checks if a field does not begin with a certain value | No |
Ends with | Checks if a field ends with a certain value | No |
Does not end with | Checks if a field does not end with a certain value | No |
Number conditions
Number filters only work with numerical values, such as 10 or 100. They don't work with dates or written forms of numbers (like ten or one hundred). For example, you could use a filter to only allow your Zap to run if an invoice is for a charge greater than a certain amount.
The following are conditions you can use for number fields:
Field type | Condition | What it means |
|---|---|---|
(Number) | Greater than | Checks if a field is greater than a certain number. |
(Number) | Less than | Checks if a field is less than a certain number. |
Date/time conditions
Like the name suggests, date/time conditions work with dates and times Zapier finds in your trigger or action. For example, you could use a filter that will allow your Zap to run if a task due date is between a specific date and time range. Remember: Filter by Zapier allows you to use multiple filter conditions if you'd like.
You can use the following date/time conditions in a filter:
Field type | Condition | What it means |
|---|---|---|
(Date/time) | After | Checks if a date or time is after a specific date |
(Date/time) | Before | Checks if a date or time is before a specific date |
(Date/time) | Equals | Checks if two dates match |
The value you want to filter must be in a date/time format, such as 01/01/2021 or 8:00 p.m. If the value you want to filter is generic, such as Monday or September, use a text condition instead.
Learn more about using filters with dates and times.
Boolean conditions
Boolean conditions will check whether a value is true or false. These conditions are specific to fields in the Zap editor that are boolean—marked with an icon with two circles.
For example, in this Zap I have a search step to find a specific field in my Notion database. The two circles in the top-right tell me that this is a boolean field.

When I use a filter later on in my Zap, I can use the boolean condition:

Generic conditions
Filter by Zapier's generic conditions can apply to any field. Using a generic condition means Zapier will check whether something exists or does not exist. A generic filter can be used with any type of field.
How do you know when you need a filter?
It's not always obvious when you need a filter. That's because each app integration behaves differently in the Zap editor, based on how the app's API works.
Signs you need a filter in a Zap:
Existing app triggers aren't as granular as you'd like. For example, if a Zap triggers for each new task in a shared project, but you only want the tasks assigned to you.
When the setup options in the Zap editor aren't specific enough. For example, in Schedule by Zapier, I can set up the Zap to trigger daily. I also have the option to turn it off on weekends. But if I want to use Schedule by Zapier to trigger on Tuesdays through Fridays, I need a filter.
How to set up a filter in a Zap
When you come to the point in your Zap where you need to add a filter, click the plus sign (+) in the Zap editor to add another step. You can either search for Filter by Zapier in the search bar or click Filter on the right-hand side.
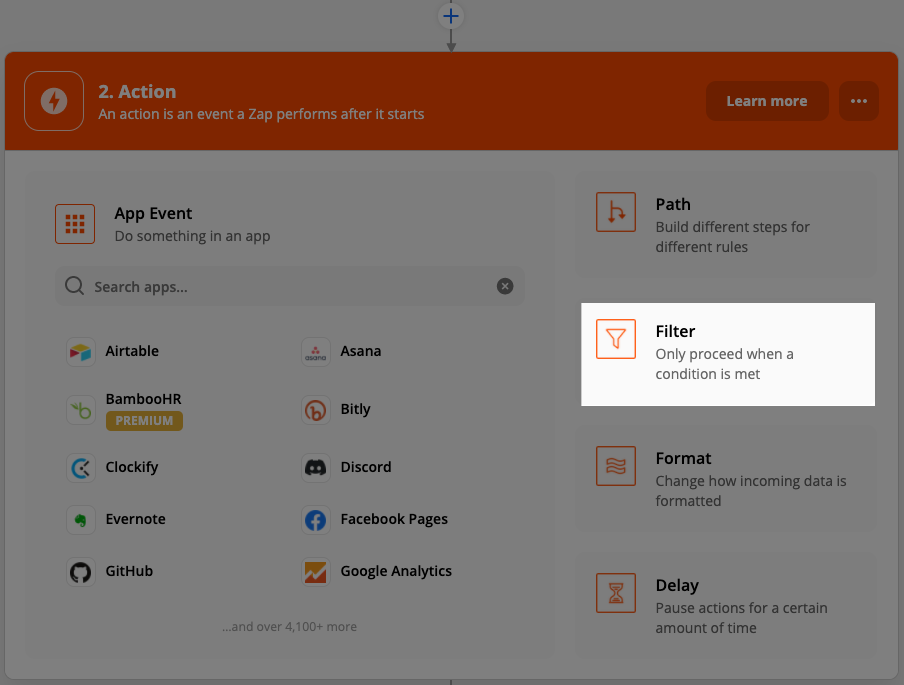
The Zap editor will then direct you to set up your filter. You'll see the following blank fields:

From left to right, these fields are:
Choose field: Something from a previous step in the Zap
Choose condition: The filter rule we want to use
Enter value: The thing we want to filter by
We'll walk through how to set up each part.
Choose field
First, you'll need to select a value from a previous step in your Zap. This will tell Zapier what you want the filter to check.

Click on the Choose field dropdown, and select the value you want the filter to check.
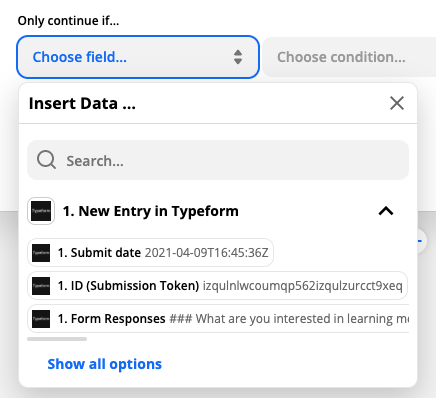
In this example, I want to check for a specific answer on my form. Clicking Show all options will expand the list. You can also type in the search bar to find the particular field you want Zapier to use in your filter.
Choose condition
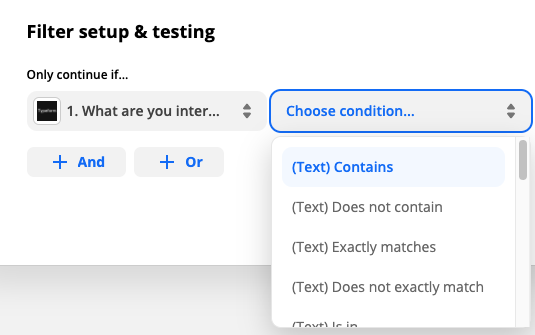
Next, you'll select the rule or condition you want your filter to check. Click on the dropdown to reveal the list of conditions and choose the one you'd like to use.

I want to filter for form submissions that submit a specific answer to a survey question in this example. Since I've selected a text field from my form submission, I'll choose the appropriate condition for text fields.
Enter a value
Next, manually fill in the far-right field. According to the filter condition you set, Filter by Zapier will compare this to the field on the far-left.

In this example, I only want my Zap to continue if someone gives a specific answer to a question in my survey requesting merchandise.

You can have your filter check more than one condition at a time. Click the + AND and + OR buttons in the Filter to add more conditions. + AND means that all of the conditions need to be met. + OR means that any of the conditions need to be met for the Zap to proceed.
Test your filter
Next, test your filter. Once you've added all your conditions, click Continue. According to the criteria you determined in the previous step, the Zap editor will tell you whether the sample data would have passed this Filter. In this example, it didn't.
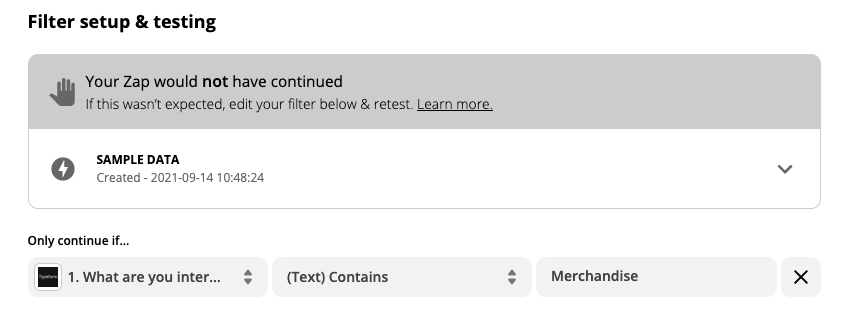
To check why the filter behaved the way it did, click on the downward-facing caret to the right of your sample data.
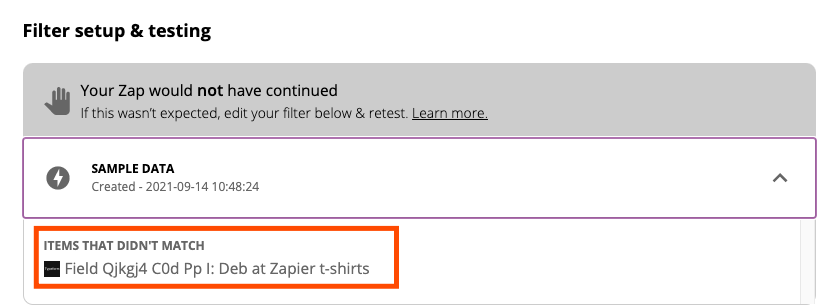
In this example, the filter step halted the Zap because the answer to the form question did not include the text the filter required. The form submission used as sample data requested Deb at Zapier shirts instead of the more open "merchandise." I expected this, so the filter is working.
If the test did not work as expected, go back to the previous step to adjust your filter and test again.
Once you're happy with your filter, you can set up the rest of your Zap and turn it on.
Filters and task usage
Remember: Zapier plans have a monthly task limit. Filters are a great way to cut down on your task usage. A Zap with a filter stops whenever the filter halts the Zap. So, if your filter comes immediately after your trigger, no tasks will be counted unless the condition is met—if the condition is met, then the filter and the following steps will count as tasks. If your filter is later in your Zap, the action steps up to your filter will always be counted.
To illustrate this point, here's the history for a Zap I use to track the articles I write on the Zapier blog:

When my Zap passes the filter, the status is "Success." Notice the number of tasks this Zap run used.
All other blog posts that didn't meet the filter criteria have a "Filtered" status. It still appears in my Zap History, but notice how it doesn't use any tasks.

You can check your Zap History to troubleshoot Zaps that aren't working how you'd like. Learn more about checking your Zap History.
Popular Zaps that use Filter by Zapier
Want inspiration on getting started with filters? Try one of these popular Zaps:
Create Google Calendar events from new Trello cards
Create Google Calendar events from new MeisterTask tasks with due dates
Send emails via Gmail for new, specified Typeform responses
Set automation ground rules with Filter by Zapier
With Filter by Zapier, you can control when your automated workflows run—beyond the standard Zap trigger. Filters will only let in the information you want, keeping your Zaps focused on the important stuff.
Need your Zaps to make decisions for you? Check out our guide to Paths.

