One of the greatest benefits of using Zapier to automate your work is that you don't need to use code. You can build Zaps (our word for automated workflows), forms, agents, chatbots, and tables without knowing any programming language.
There may come a time, however, when you need to do something a little more advanced. Perhaps you know exactly what you want to automate, but Zapier's existing actions or triggers can't make it happen. Or maybe you're getting information from App A, but it's not in the right format for App B, and it would take lots of steps to get there otherwise.
That's where Code by Zapier comes in. It's a built-in tool specifically for adding the "code" back into "no-code," so you can fully customize your workflows—and even shape AI-generated data, like formatting AI outputs or adding guardrails to keep content consistent. And here's the twist: you don't need to know a lick of code to use code steps. Intrigued? Let's dive in.
New to Zapier? It's workflow automation software that lets you focus on what matters. Combine forms, data tables, and logic with thousands of apps to build and automate anything you can imagine. Contact sales to learn more.
Jump ahead
What is Code by Zapier?
Code by Zapier lets you add custom code to your Zaps so you can perform specific tasks that go beyond the pre-built triggers and actions provided by Zapier's existing integrations.
Code steps act just like any other trigger or action, with one important difference: you tell those steps what to do in Python or JavaScript. These extra instructions within your Zaps can come in handy when you need to do something more advanced that Zapier might not natively support. You might, for example, use code steps to implement complex lookup tables, process line items, clean up raw data like XML, or retrieve dynamic dates from your data.
When used as a trigger, Code by Zapier typically processes input data or checks for specific conditions to decide if the workflow should start. As an action, it allows you to write code that will interact with data coming from the trigger or a previous action step. Actions using code can process information, rearrange data, or retrieve data from an API before sending it on to later steps in your Zap.
Note: Zaps work one step at a time, starting with the trigger at the top. Make sure that your Code action is placed below the trigger or action that gathers the data you want to use and above any actions that might need the data it outputs.
And if you don't know how to write code—or you just get stuck—you can use AI directly within the Zap editor to generate code snippets by simply describing what you'd like to do.
In essence, code steps allow you to fully customize your workflows and take your business processes to the next level.
Key features include:
Custom scripts: Write JavaScript or Python code to run custom logic or operations not supported by standard Zapier integrations.
Data manipulation: Transform, format, or modify data from previous Zap steps to meet specific requirements.
Variable support: Use variables to store and manipulate data within your scripts, making your code more dynamic and adaptable.
Built-in Python utilities: Store and retrieve data between Zap runs with StoreClient, send HTTP requests with the request utility, and use the print utility to debug your function during execution.
Built-in JavaScript utilities: Store and retrieve data between Zap runs with StoreClient, use callback functions to handle tasks that take time to complete, make HTTP requests with the fetch utility, and debug your function with console.log.
AI code generator: Describe how you'd like to customize your trigger or action (in plain English), and AI will write the JavaScript or Python code for you.
Testing and debugging: Run your Zap via the dashboard to confirm the behavior you expect and check your Zap history for information around your code steps' input data, output details, and logs.
What you can do with Code by Zapier
With Code by Zapier, the possibilities are endless. While most use cases will depend on your unique business challenges, here are a few popular examples.
Send scheduled HTTP requests to an external API
You want to send or retrieve data from an app that doesn't have a native Zapier integration.
What this might look like:
A Zap is triggered every hour using Schedule by Zapier.
A Code by Zapier step sends a custom HTTP request to an external API endpoint and parses the response.
The parsed API response is used to add or update a row to a Google sheet.
Parsing and transforming Slack messages with JavaScript
You want to extract and clean up specific data from Slack messages before sending them to another app, without relying on multiple Formatter steps.
What this might look like:
A new message is posted to a Slack channel.
A Code by Zapier step parses the message text, removes user mentions, and extracts the relevant content using regex.
The cleaned message text is sent to Airtable as a structured field in a new record.

Note: For most single-step changes—like splitting a field, finding and replacing values, or adjusting case, you can use Formatter instead. Code steps are for you if you need more control or complexity, like combining multiple adjustments into a single step that might otherwise require several Formatter action steps.
Normalizing timestamps for table storage
Your incoming table records use ambiguous or inconsistent date formats, and you want to make sure timestamps are stored consistently.
What this might look like:
A record is added or updated in Zapier Tables.
A Code by Zapier step explicitly parses the incoming timestamp and converts it to ISO 8601 in UTC.
The normalized timestamp is written back to Zapier Tables by updating the original record.
Tip: If you run into trouble, coding communities like Stack Overflow or the Zapier Community are great for getting help from other coders to fine-tune your code or troubleshoot.
How to get started with Code by Zapier
Want to try out a code step?
To use Code as a trigger, follow these steps:
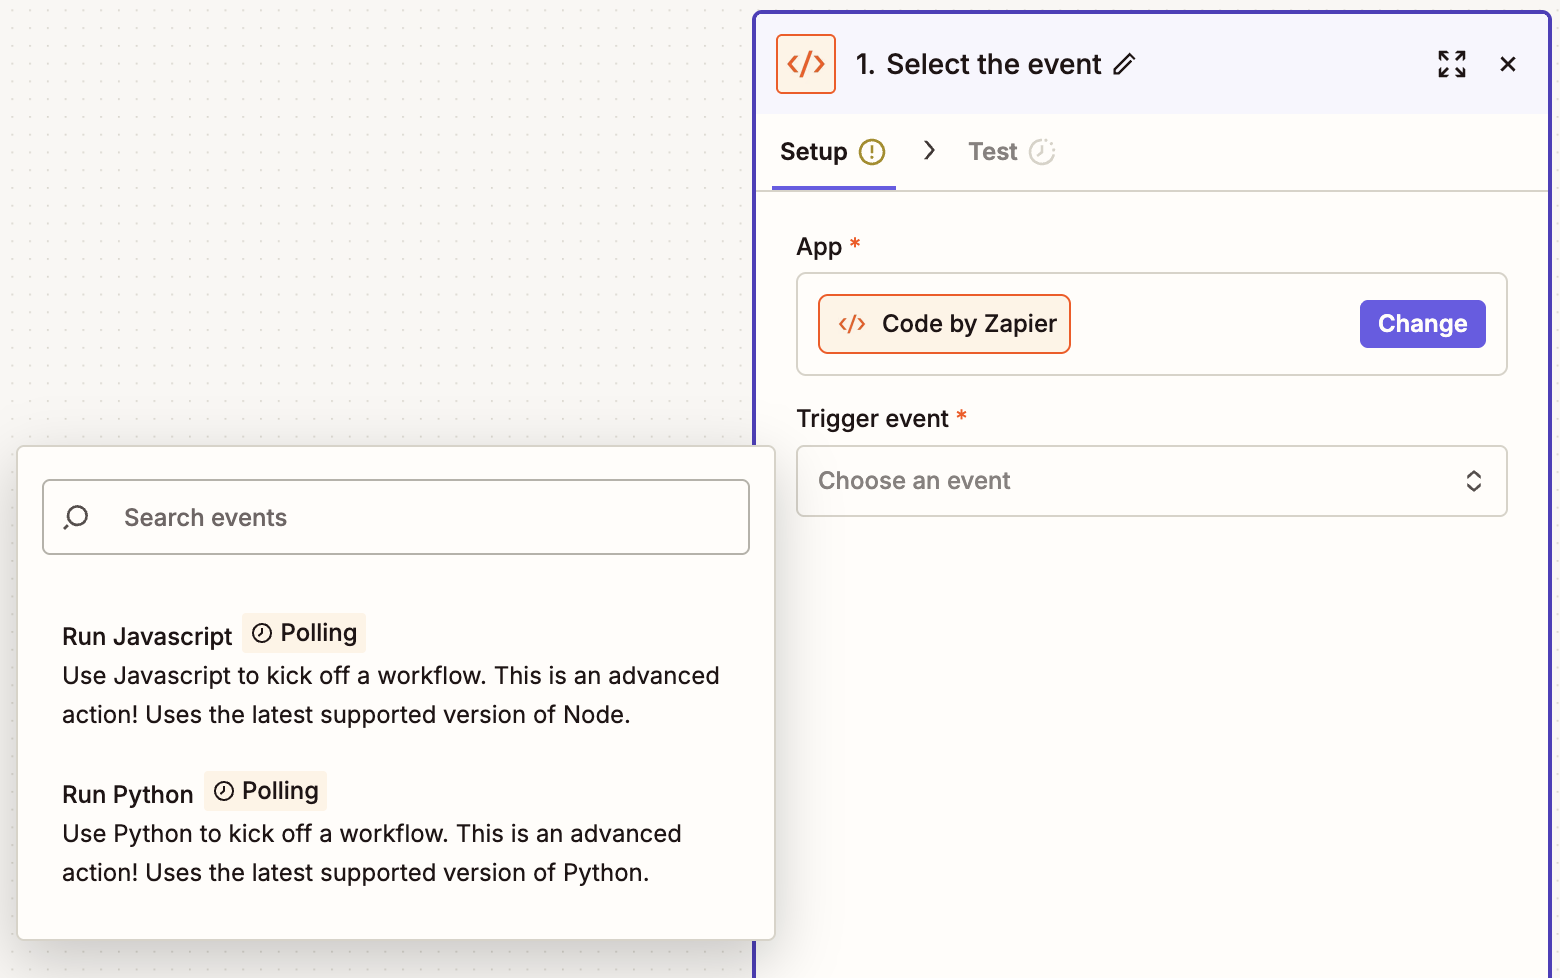
In the Zap editor, click the trigger step, then search for and select Code by Zapier.
Click the event dropdown menu and select Run Javascript or Run Python, then click Continue.
In the Configure tab, use the Code field to enter your JavaScript or Python code.
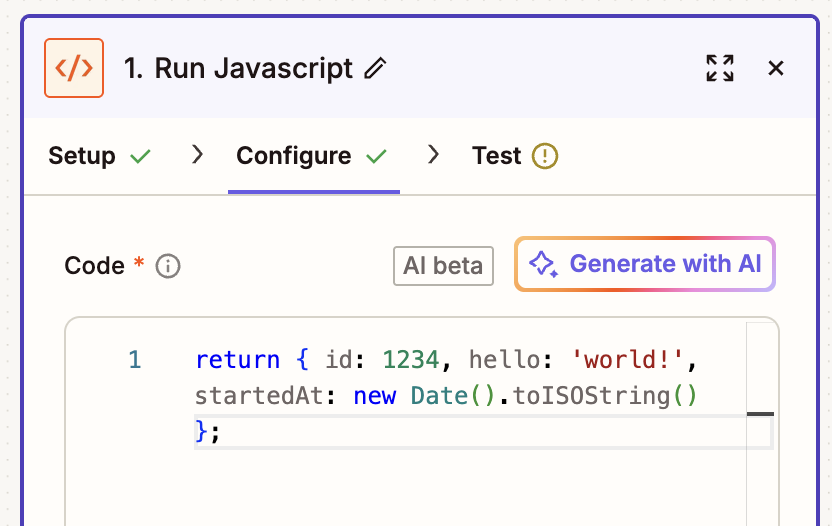
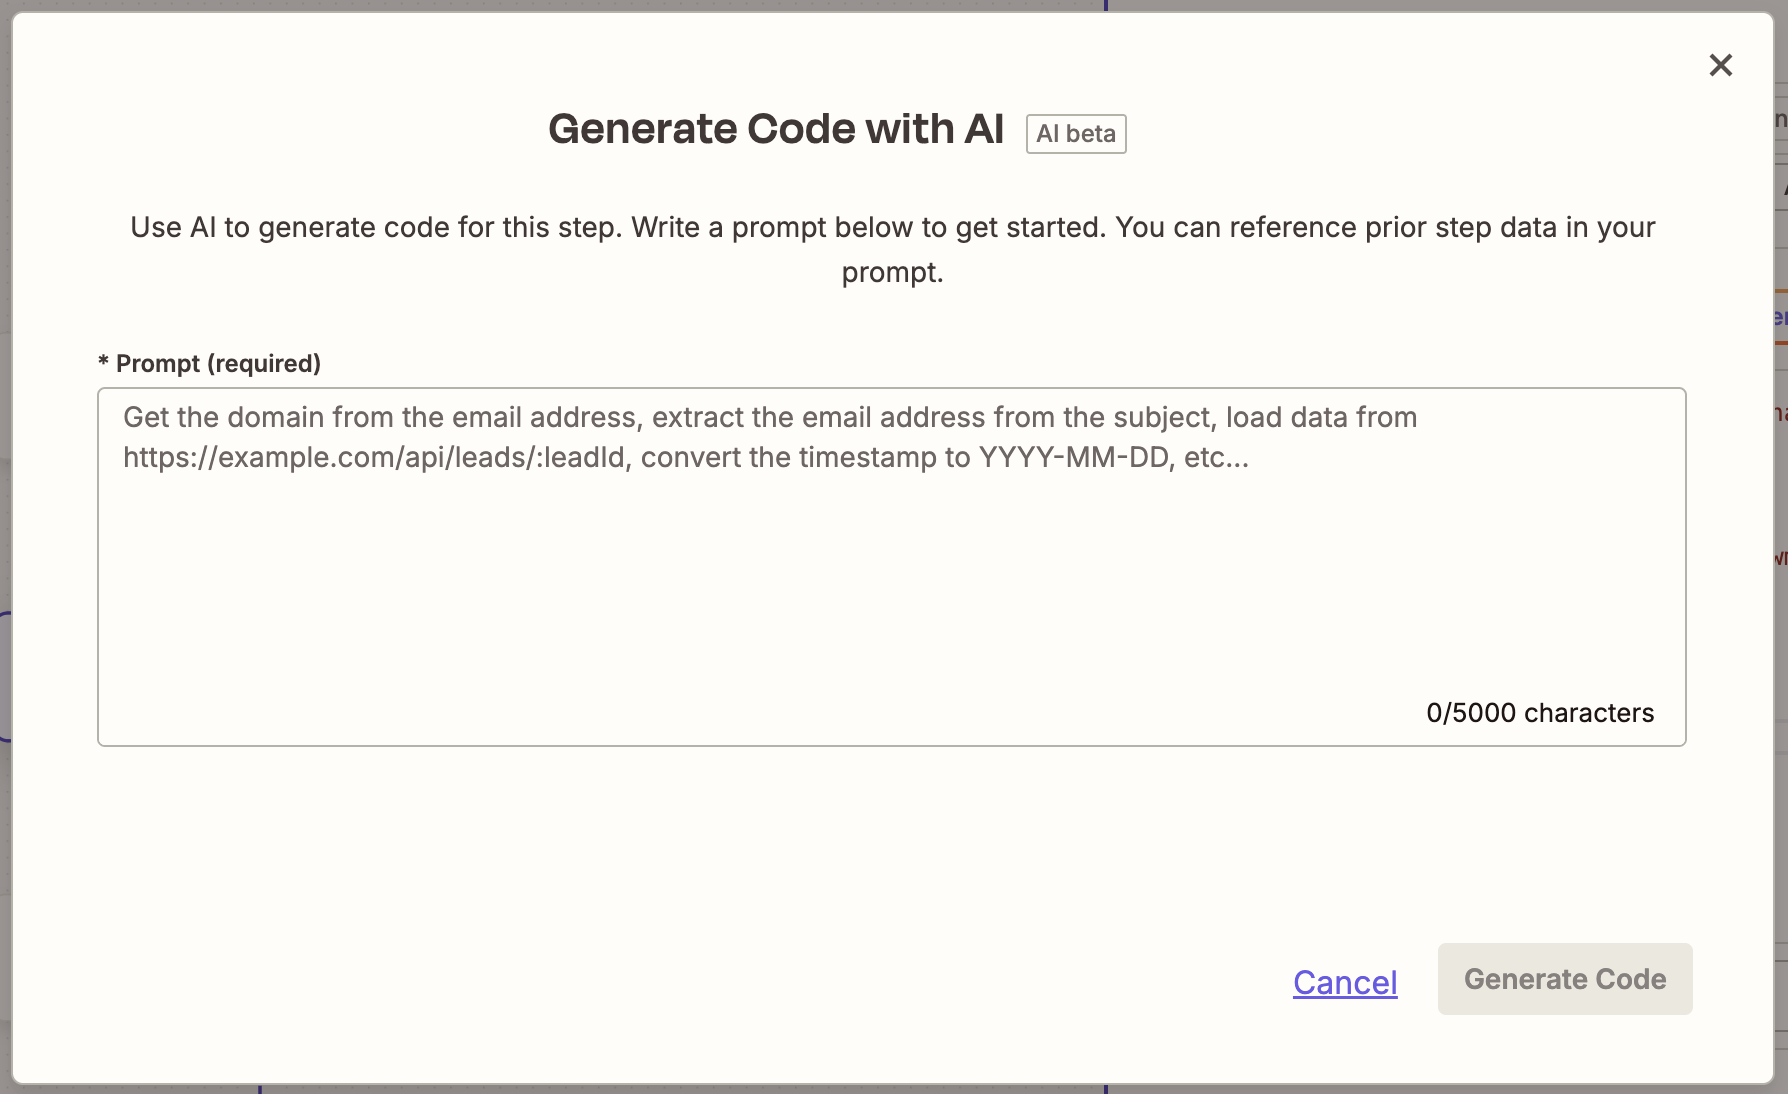
If you'd like AI to write code for you, click Generate with AI. In the dialog box, enter a prompt that describes your desired code. Click Generate code, then click Use code.
Once you've finished adding your code, click Continue to test your code step. If your code is valid, the step will show it was successful and display the data.
Now it's time to add an action. Search for and select your action app. Connect your account, set up the action step, and test the action.
Once you've finished adding your action step(s) to your Zap, remember to turn it on.


To use Code as an action, follow these steps:
In the Zap editor, click the trigger step, then search for and select your trigger app and the trigger event. Connect your account, set up the trigger step, and test the step.
Once you've finished setting up your trigger, click the +icon to add a new step.
Search for and select Code by Zapier.
Click the event dropdown menu and select Run Javascript or Run Python. Then click Continue.
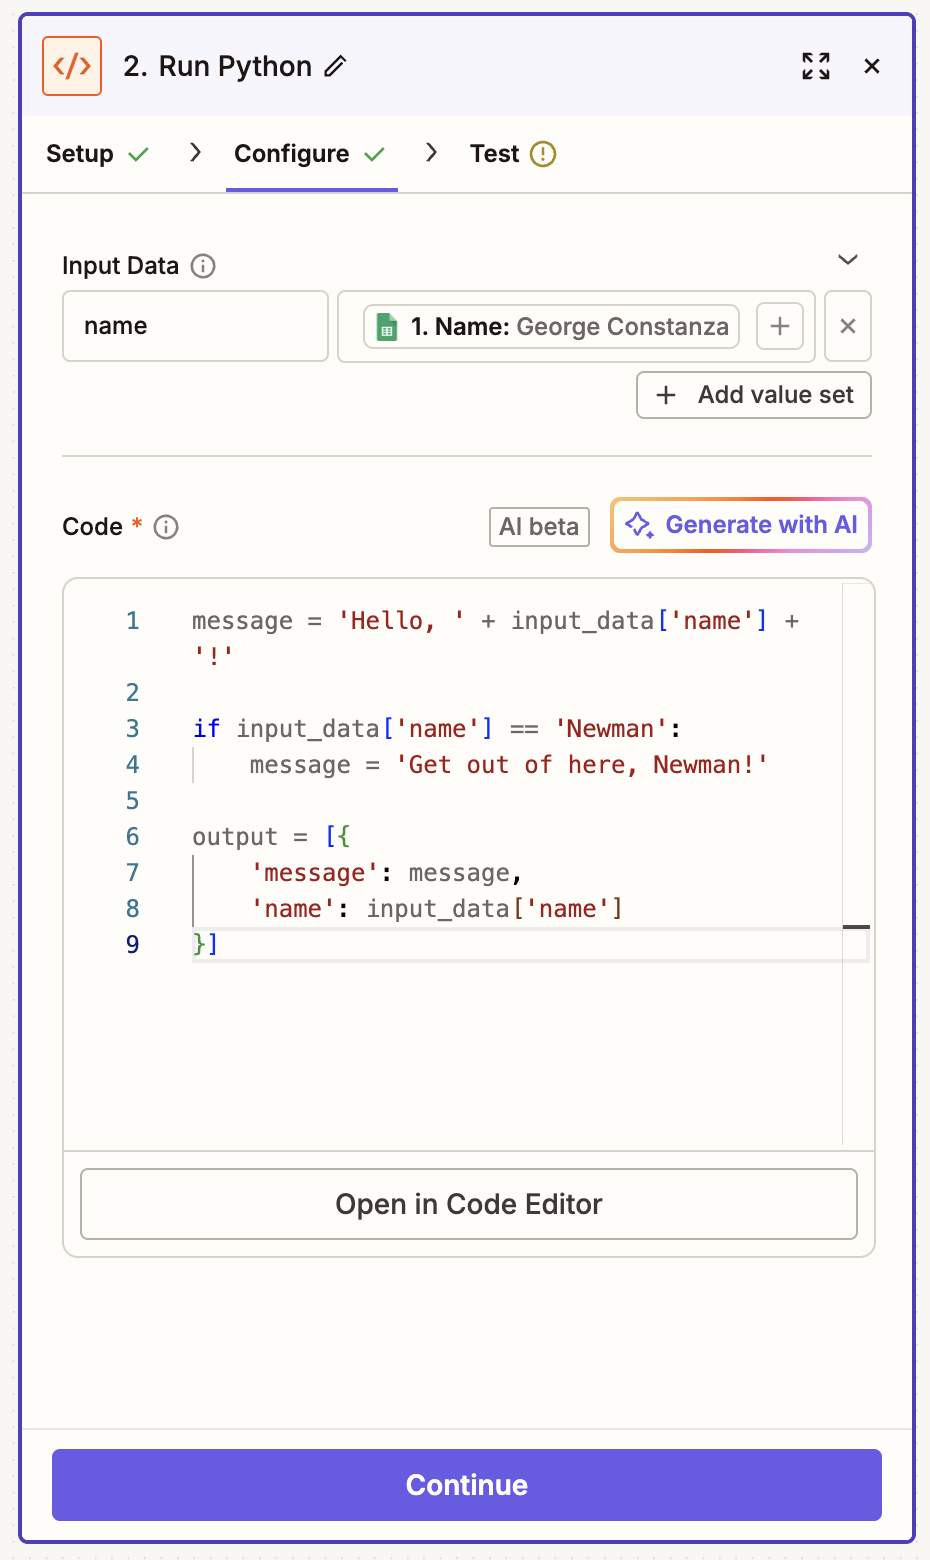
In the Input Data field, provide a key name and map the data from your trigger step. In the Code field, enter your JavaScript or Python code.
If you'd like to use the AI option, click Generate with AI. In the dialog box, enter a prompt that describes your desired code. Click Generate code, then click Use code.
Click Continue, then click Test step. If your code is valid, the step will show it was successful and display the data sent.
Once you've finished adding your action step(s) to your Zap, remember to test and turn it on.

For more information on setting up code steps in your Zap, check out our JavaScript or Python help guides for step-by-step instructions.
Did you know? You can ask Copilot, Zapier's built-in AI assistant, to brainstorm, build, configure, and maintain cross-product automated systems.

Use code steps to power your business's growth
With Code by Zapier, you can customize your workflows so they automate complex tasks, integrate seamlessly with any API or custom application, and ultimately, solve problems unique to your business.
By adding that extra layer of code, you can transform your data in ways standard integrations can't.
Ready to try it out yourself? Build a Zap with code steps now and start powering your business today.
This guide was originally published in May 2022 by Tyler Robertson with previous updates from Elena Alston. It was most recently updated in December 2025.