I'm not a coder. I couldn't tell you the difference between JavaScript and Python if my life depended on it. I wouldn't know a command if it hit me in the face. So, for obvious reasons, I'm always a little weary of testing out tools that require even basic SDK knowledge.
That's why, at first, I wasn't sure if I had the technical savvy to try out Leap AI, a nifty image-generation tool that works on JavaScript and that folks can integrate into their own apps.
But Leap AI lets you play around with their own AI models (and build your own!) directly in any browser first. So I signed up for a free account to see what, as a complete and utter beginner, I could achieve.
It turns out quite a bit.
What is Leap AI?
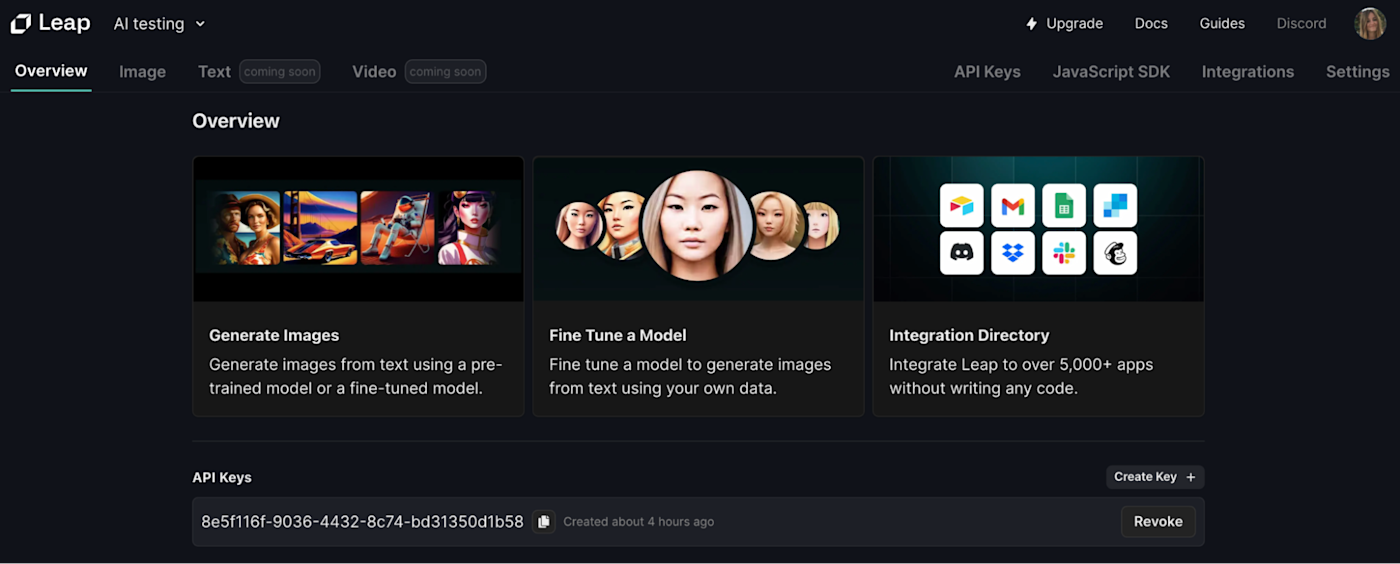
Leap AI is a platform that lets you generate images (e.g., art, avatars, logos) using pre-trained, open-source models like Openjourney and Stable Diffusion.
Like many other AI image generators, it's text-to-image, which means you just type in your prompt using natural language. In other words: you say what you want your image to look like, and the AI will take care of the rest.
Its best use case, though, is that you can train your own models to generate images based on the originals you feed it. Imagine, as an example, you upload a few of your own personal headshots. Leap AI can then take those stills and create an avatar for you.
Developers and app creators can then integrate those personalized AI models into their apps, so they can build things like an image classifier, for example, or whatever cool, next-generation app idea they come up with.
Since I'm not a developer, I'll focus on those first two parts: image generation and model training.
How to get started with Leap AI
The best way to get started with Leap AI is to dive right in and test out its image capabilities in the playground. Here's a quick version:
Go to Leap AI's website and sign up (there's a free option).
Click Image on the home page next to Overview.
Once you're inside the playground, type your prompt in the prompt box, and click Generate.
Wait a few seconds, and you'll have four AI-generated images to choose from.
Click the one you like, then Download, Save, or Share it.
Right now, you can use Leap AI mostly for image generation and editing, but soon it'll open its doors to text and video generation—something I'll be very interested to see.
With a free account, you can generate up to 100 images in the playground—with a cap on training one free model per month. With a paid plan, you'll pay $0.005 for each additional image and $2 for each additional model.
Generate images with text-based prompts
When it comes to generating AI images with a prompt, Leap AI works more or less the same way as any other text-to-image app (like DALL·E 2 or Midjourney). You enter your prompt, and you'll be given a series of images to choose from.
The main difference between those apps and Leap AI are the models. While Midjourney and DALL·E have closed source, proprietary models that you have to use, Leap AI gives you the option of choosing between a whole bunch of open source models, like Openjourney and Stable Diffusion.
To be clear: these models don't belong to Leap AI, but because they're open source, anyone can download and use them in their own app if they have the technical skills.
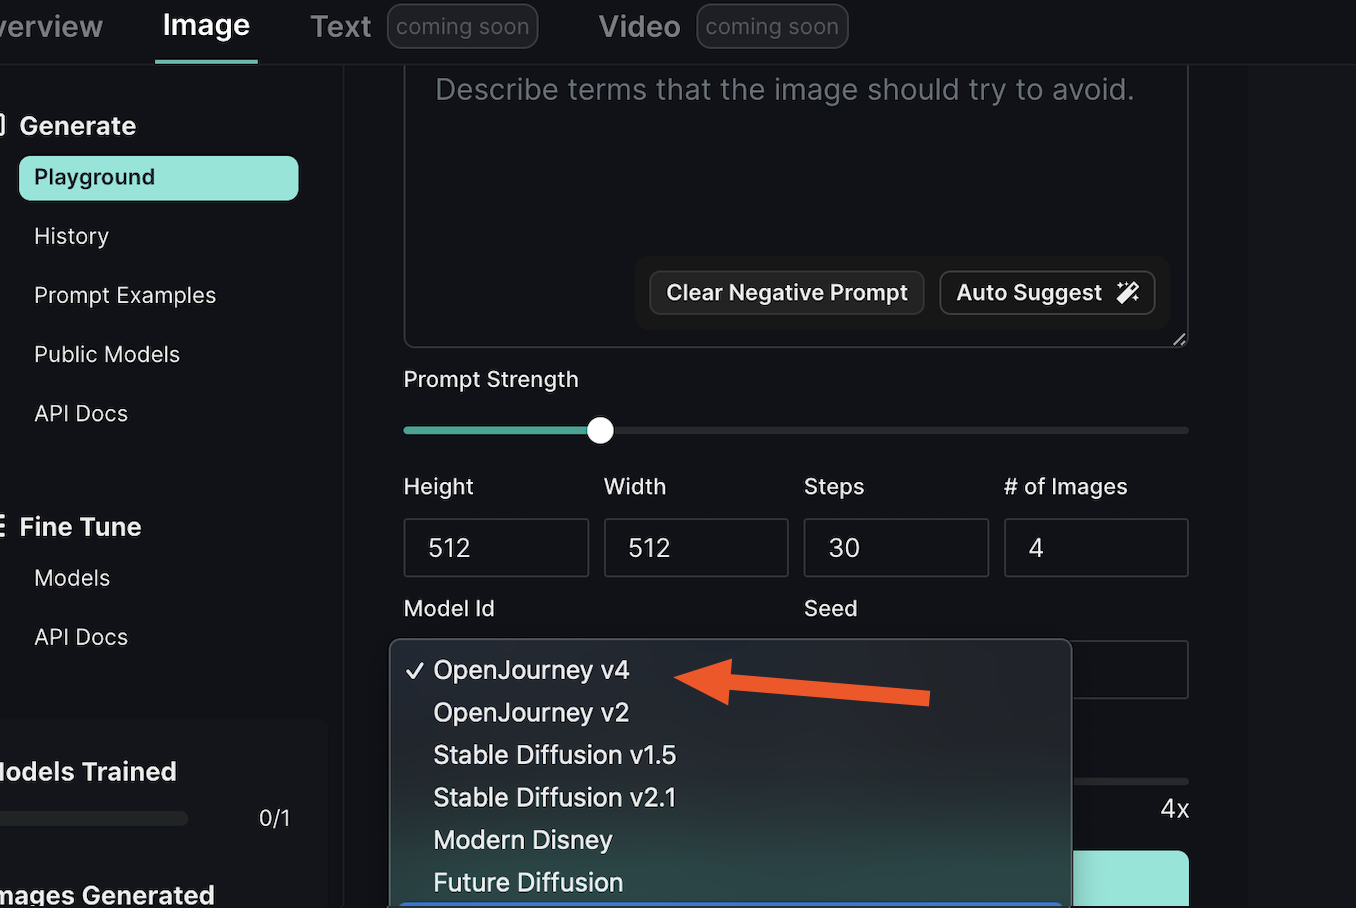
The benefit is two-fold: you can test out different models in the playground, and if you're able, you can integrate those models into your own app. In my case, I'll be using OpenJourney v4—it's the one that comes recommended by Leap AI.
So, let's start in the playground. It's where no-coders can easily test out the platform's image generation capabilities—without having to first go through JavaScript documentation and carry out the same tasks inside a terminal.
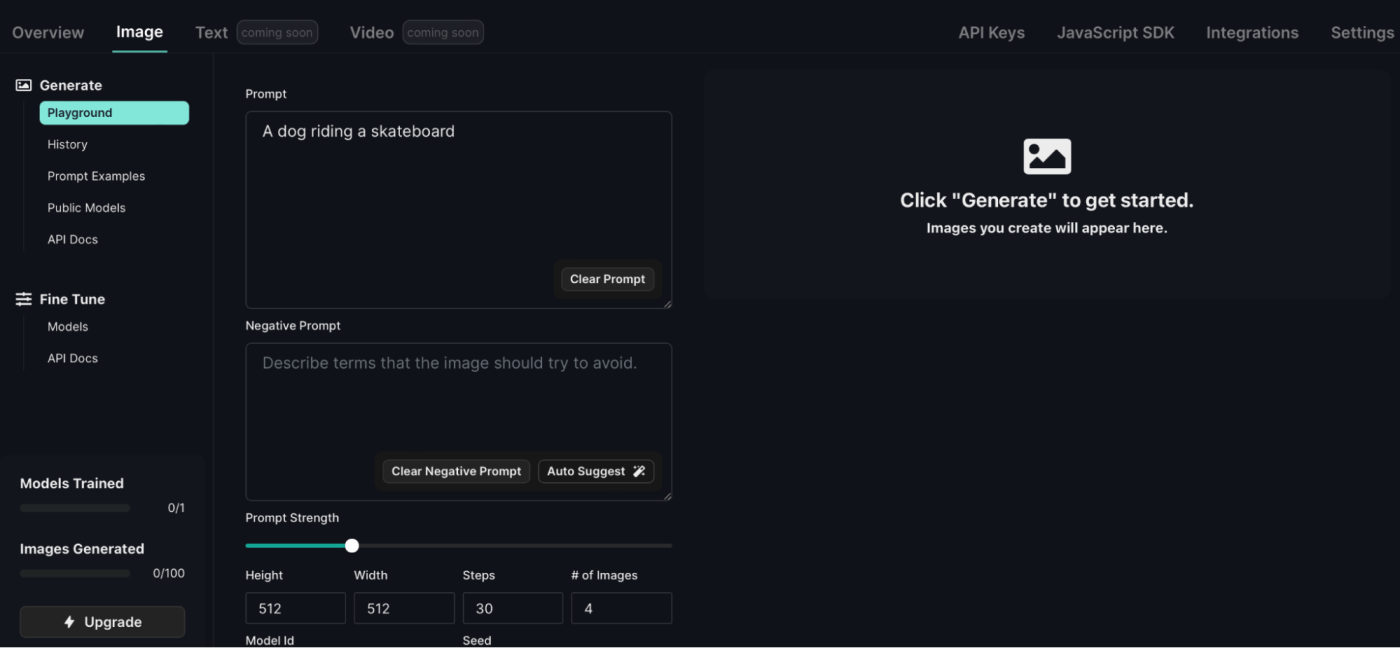
There's a simple text box where you add your prompt, for example: "An astronaut sitting on the moon in a sun lounger." There are also a bunch of additional parameters you can set, but let's take a quick look at this example first.
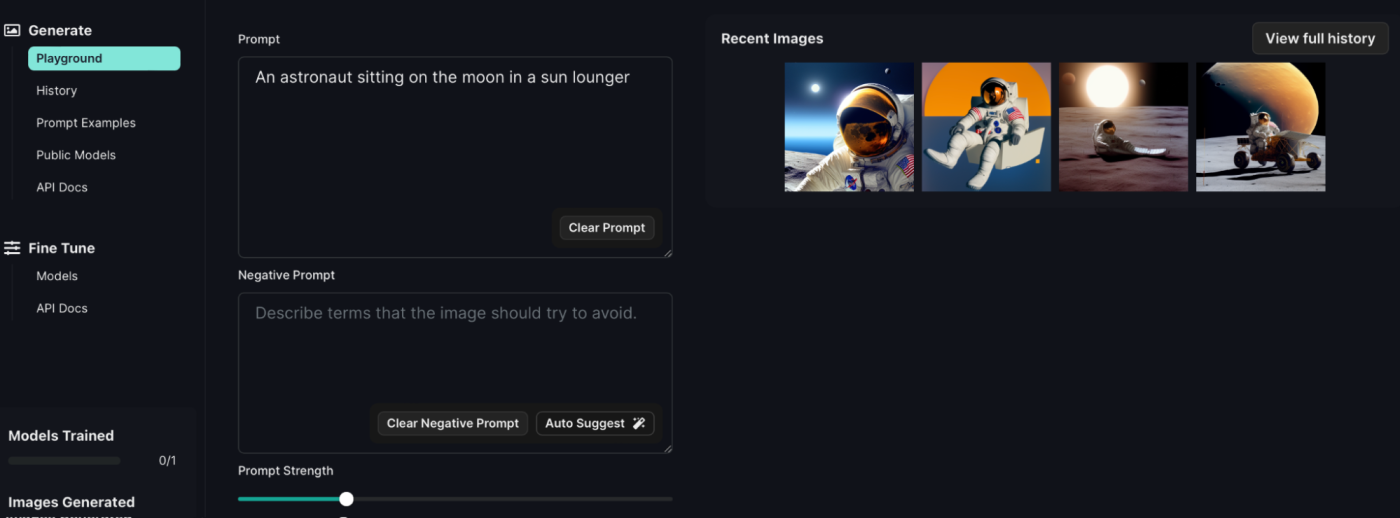
As you can see, the images will appear on the right-hand side. Click on one of your generated images, and it will give you the specific parameters with which it was built. You can download, save, or share it.
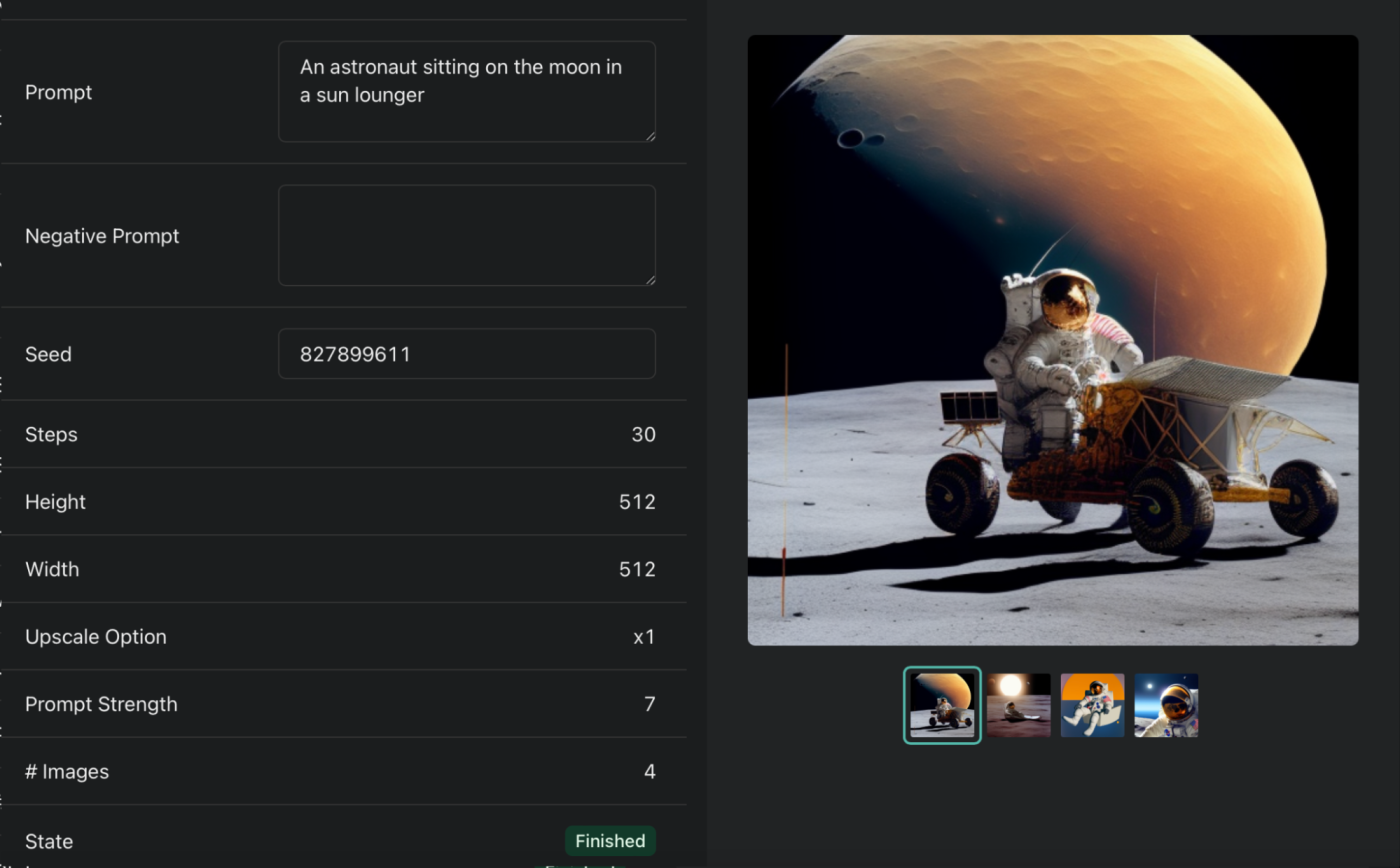
Now admittedly, these first images I generated aren't super impressive (or even match my prompt accurately), but that's on me: I wasn't very clear.
If you want to learn how to write better prompts, take a look at the side panel on the left, and click Prompt Examples. You'll see how much better the AI performs when it's given a detailed prompt like this one.
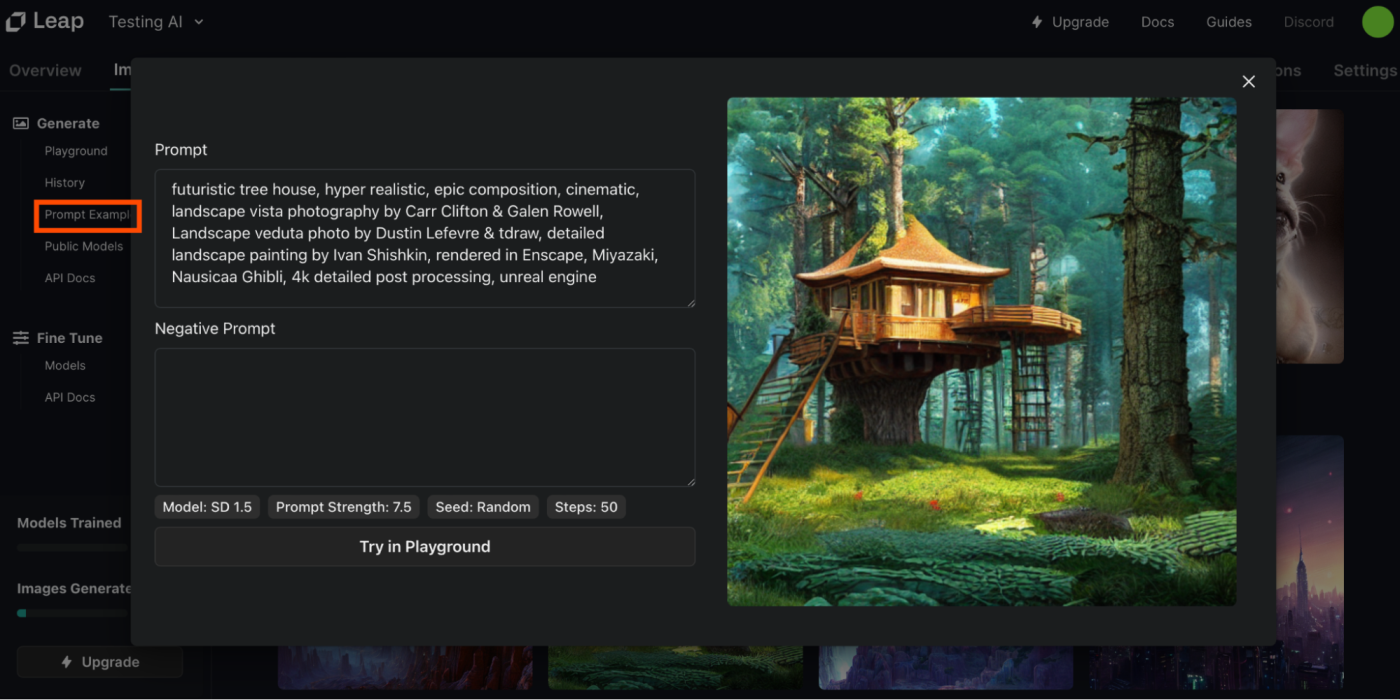
You don't really even have to explain your idea in whole sentences. As long as you add in keywords, concepts, or styles the AI can pick up on to add flavor to your image, you should get better results.
And that's exactly where Leap AI's Negative Prompt box comes in, too. If there's anything you really want to avoid (like a specific style, object, or creepy hands, for example), you should specify it there, and the AI will exclude it from your results. If you're not sure what to include here, you can use the auto-suggest feature to fill out those keywords for you.
Another tip: adjust the prompt strength. By default, it's set to 7, but the higher the strength, the closer the image will be to your prompt (supposedly).
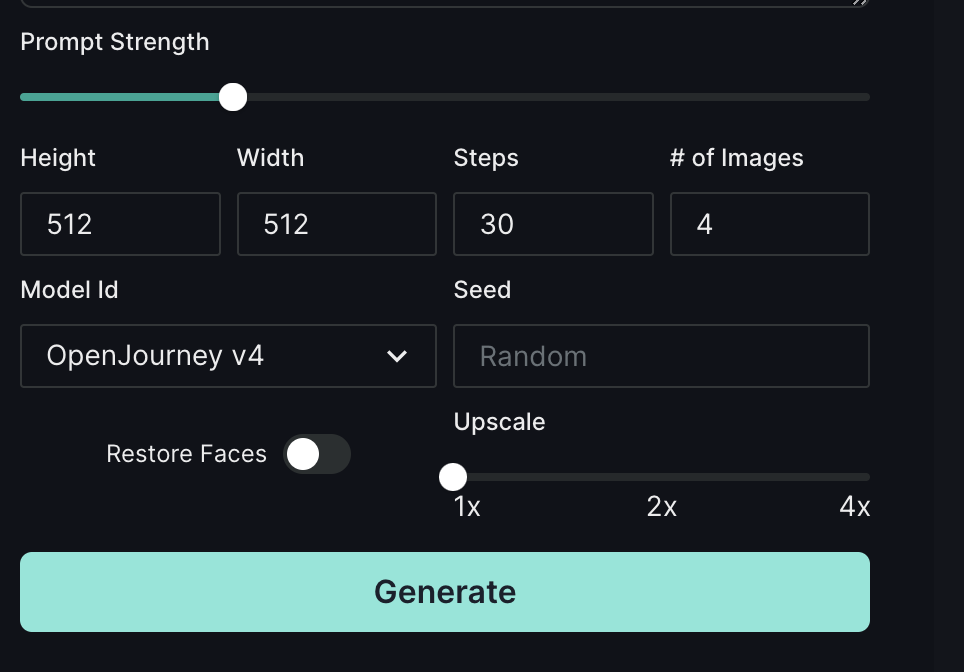
Although when I tested that theory by cranking up the strength dial, I was given this (quite frankly) disturbing picture of "hands."
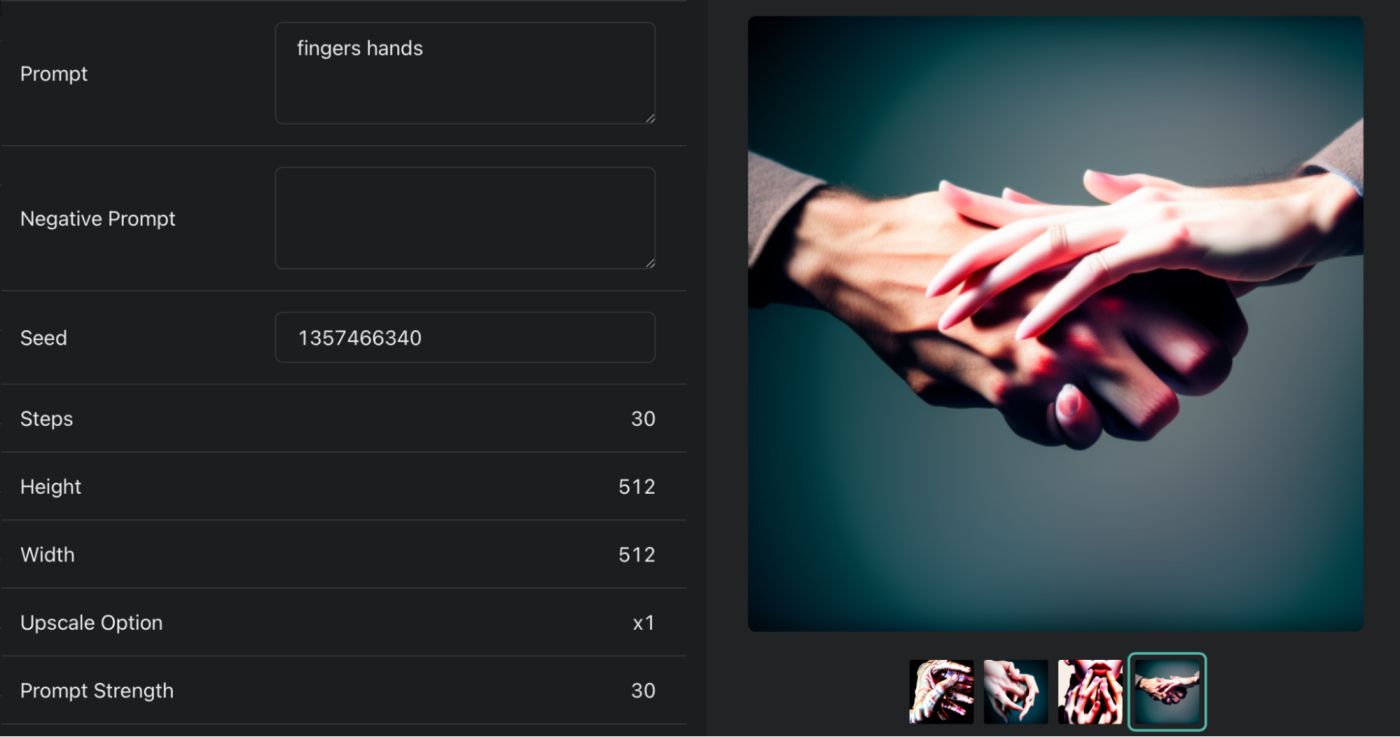
😬
I quickly fixed this by also adjusting the upscaling parameter. The higher your upscaling, the more realistic your images will look. It's set at x1 (no upscaling), but you can adjust all the way up to x4.
Here's a look at an image that has heightened prompt strength and maximum upscaling. As you'll see, it looks more like a photograph than the previous images I shared.
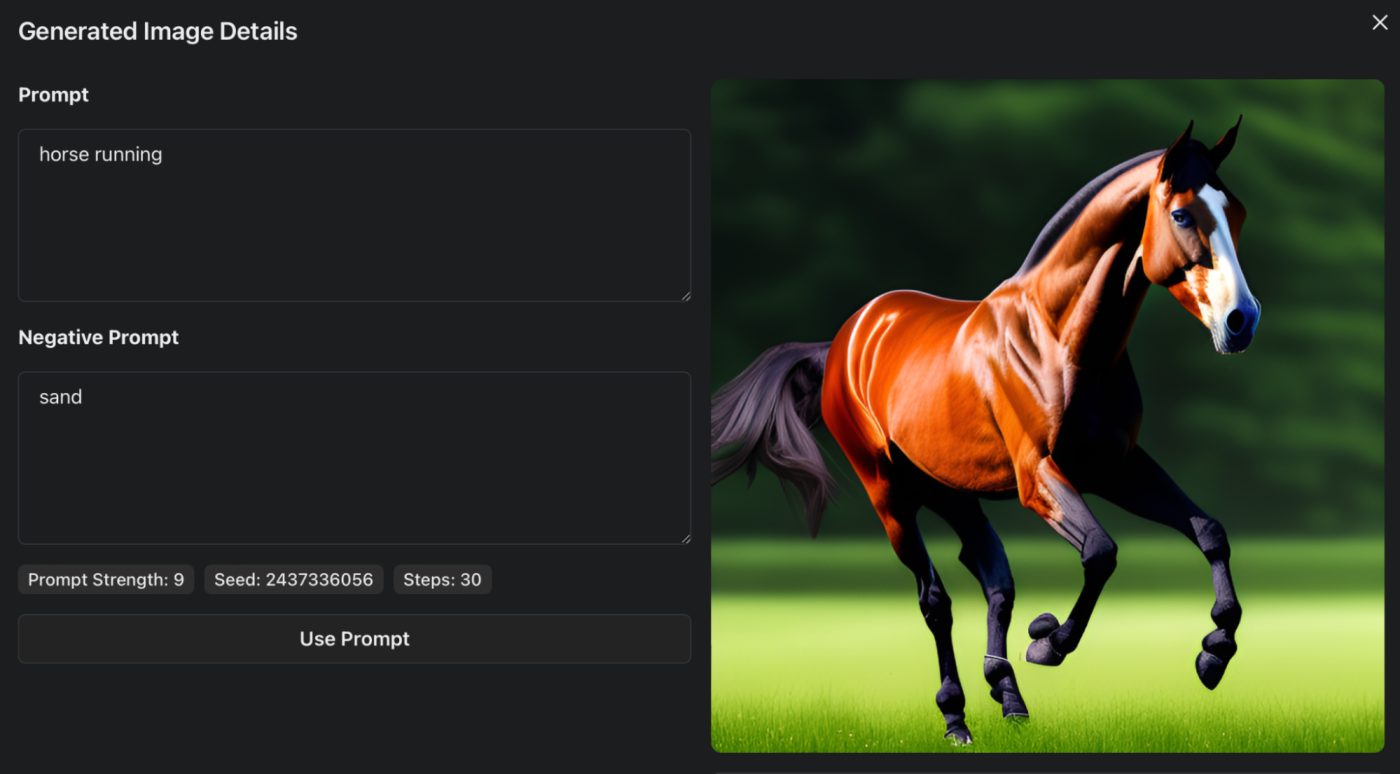
This differentiates the model from DALL·E, for example, as DALL·E doesn't deal with photography too accurately.
Here's a quick recap on writing better prompts:
Be specific and detailed in your output. Make sure you write out exactly what you're after, like "dog chasing another dog in a field" instead of just "dog running." The AI will be able to narrow down its results better.
Include keywords of specific styles. Don't just say "painting." Instead, add in the name of particular identifiers like "cubism" or "abstract art," so the AI doesn't pull in random styles. You can even include common descriptors like "cinematic shots" or "Ghibli-esque shots."
Exclude any unwanted terms or details. Don't want bad-quality images or mutated hands? Add terms like "low quality" or "bad anatomy" to your negative prompt box so the AI knows to omit them. (Or use the auto-suggest feature to add them for you.)
Adjust your prompt strength and upscaling. The higher your prompt strength, the closer to your prompt your AI results will be. This works better in combination with upscaling, as this parameter adds a more realistic or photographic quality to your images.
Train your AI model
Now let's tackle one of the most appealing aspects of Leap AI: you can fine-tune your own model with your own images, and use AI to create images using that model as a reference.
The possibilities for this are pretty cool, and while it sounds deceptively complicated, it's actually really easy to do. (Again, total noob over here.)
Start by clicking Fine Tune on the left-side panel of your navigation bar.
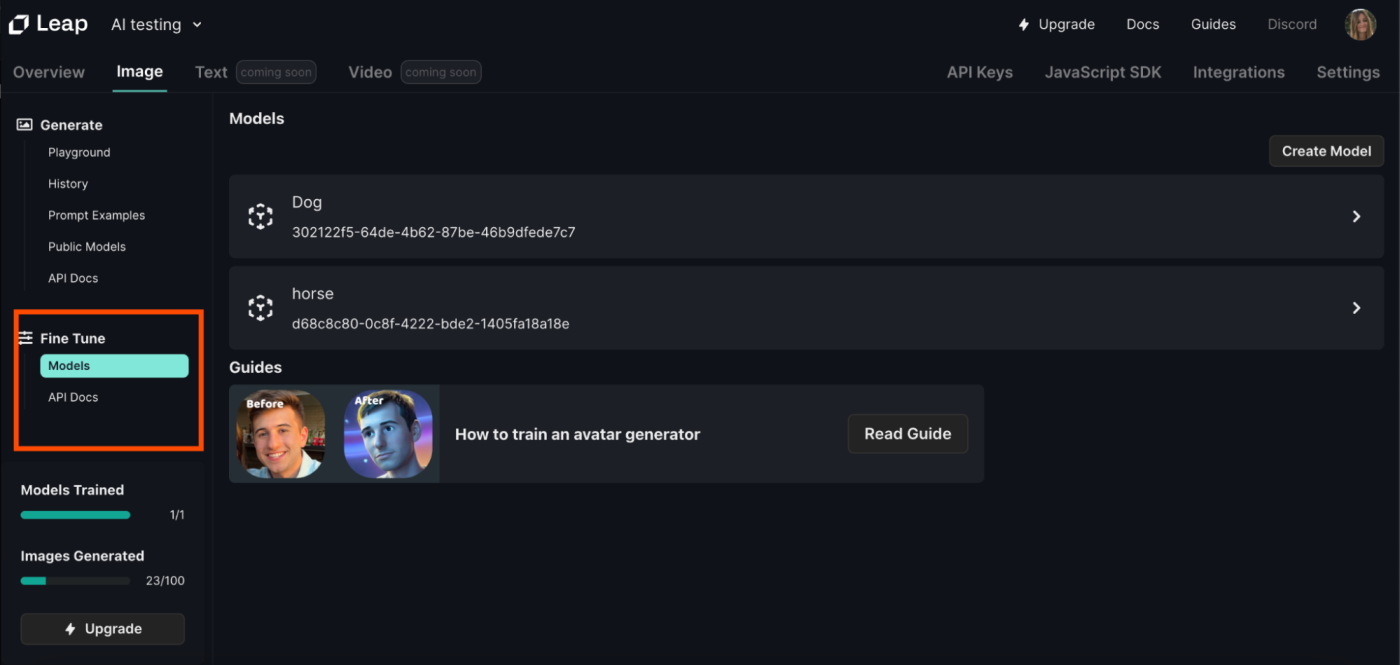
I wanted to create a model based on a specific dog, so I labeled mine "dog" and added in a simple subject keyword of @dog, which I'll later use inside my prompts.
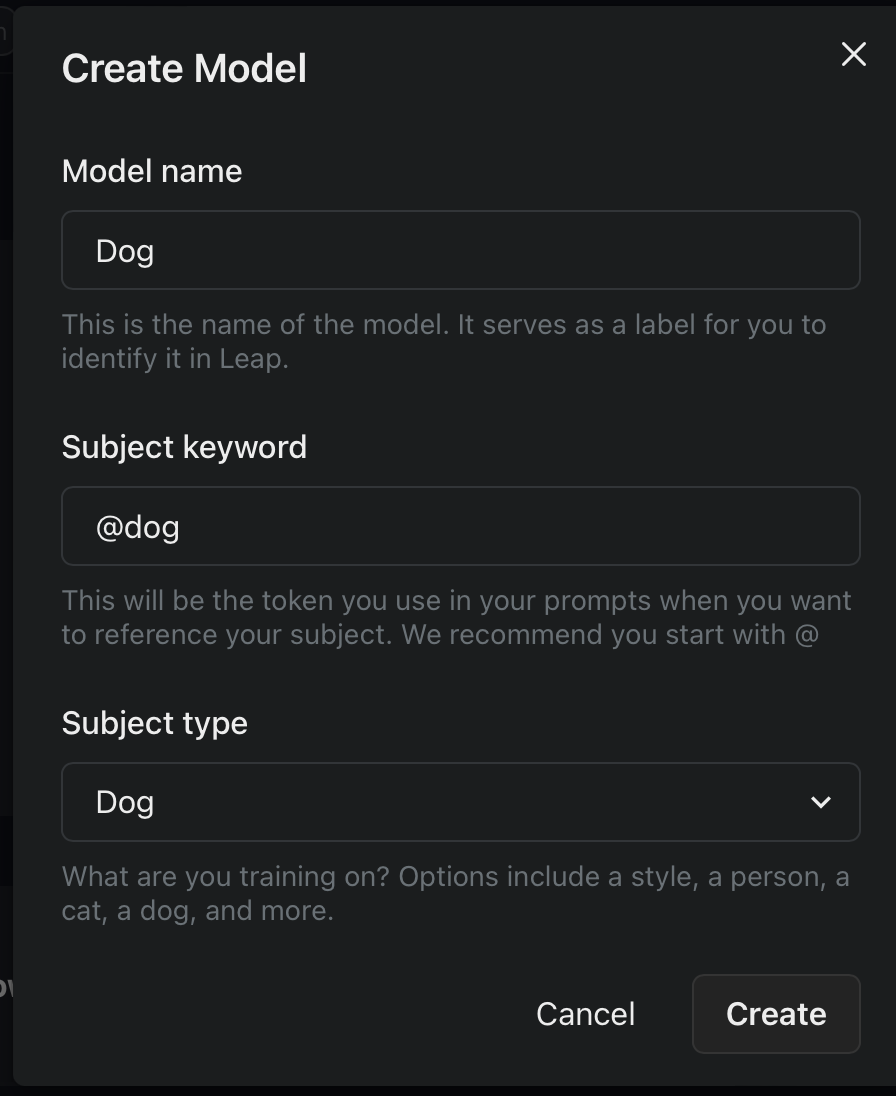
It doesn't have to be a dog, obviously. (Though it probably should be.) You can choose a specific style, another animal, a celebrity, or even yourself.
You can imagine how powerful this can be when training it on specific people. You can't just use any AI image generator to create a convincing portrait of yourself—the AI doesn't know what you look like. Fine-tuning a model on Leap AI means you'll get an almost perfect self-replica. (Just don't upload photos of different people—the results are…just don't do it.)
When you click Create, you'll then be given the option to upload a few sample images of that specific object. (You should give it at least three images, to give the AI a few different postures.) It will absorb those images and learn how to create something new within that frame of reference.
So I uploaded a bunch of pictures of Winston the dog.
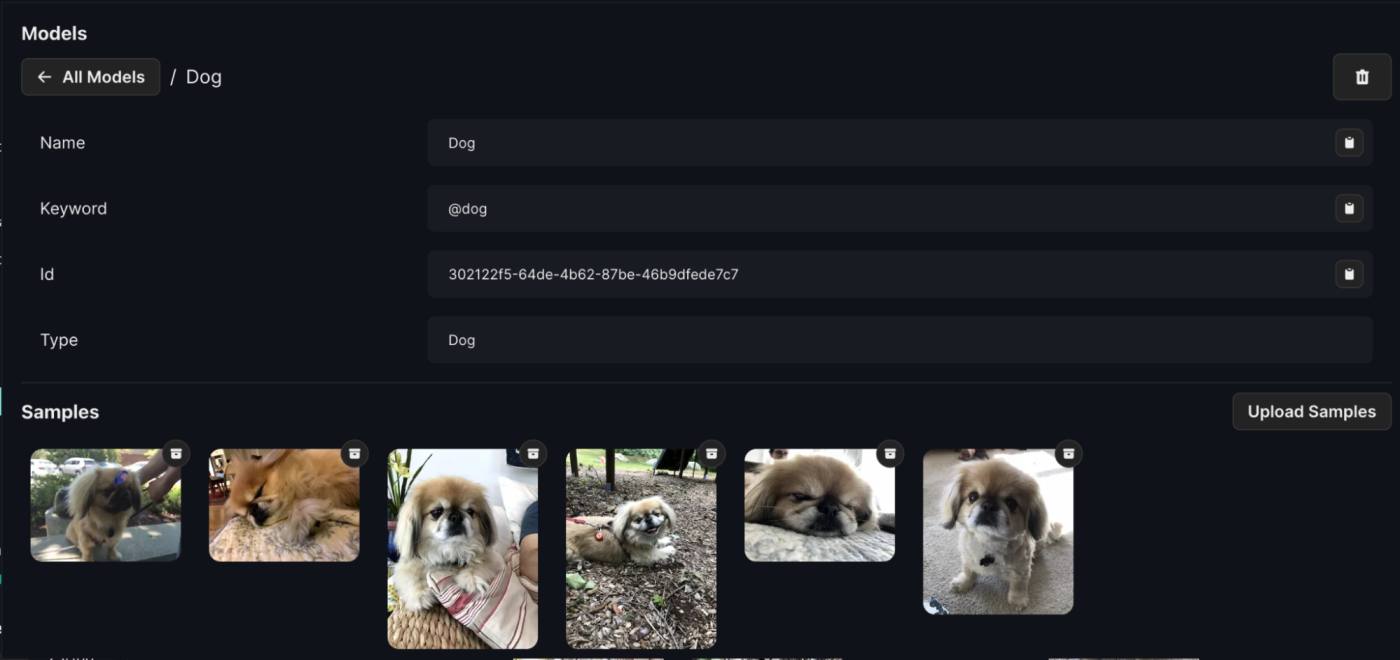
Leap AI recommends keeping most images to about 512 x 512px for the best results. For pics of humans, you should also make sure their faces aren't shadowed or hidden by glasses, or the AI won't be able to distinguish features clearly.
Once you've finished uploading your samples, click Train New Version, which will create your model. This means that now, whenever I use @dog inside my prompt, the AI will know I'm specifically referring to my personal doggy model—and use it as a reference.
Training can take anywhere between 10 to 30 minutes, so be patient. Once it's finished, you can click Try in Playground. And that's literally it. Your model is ready to be used.
To be clear, this new model still leverages Openjourney's capabilities as the foundational model, but it's trained on my personal dataset of images.
Generate images based on your custom model's data
Now for the fun part. Inside your prompt, you'll want to tag the keyword that you used to train your model. So in my case, I'll pull in @dog and type out a prompt—using a few tips I learned about instructions.

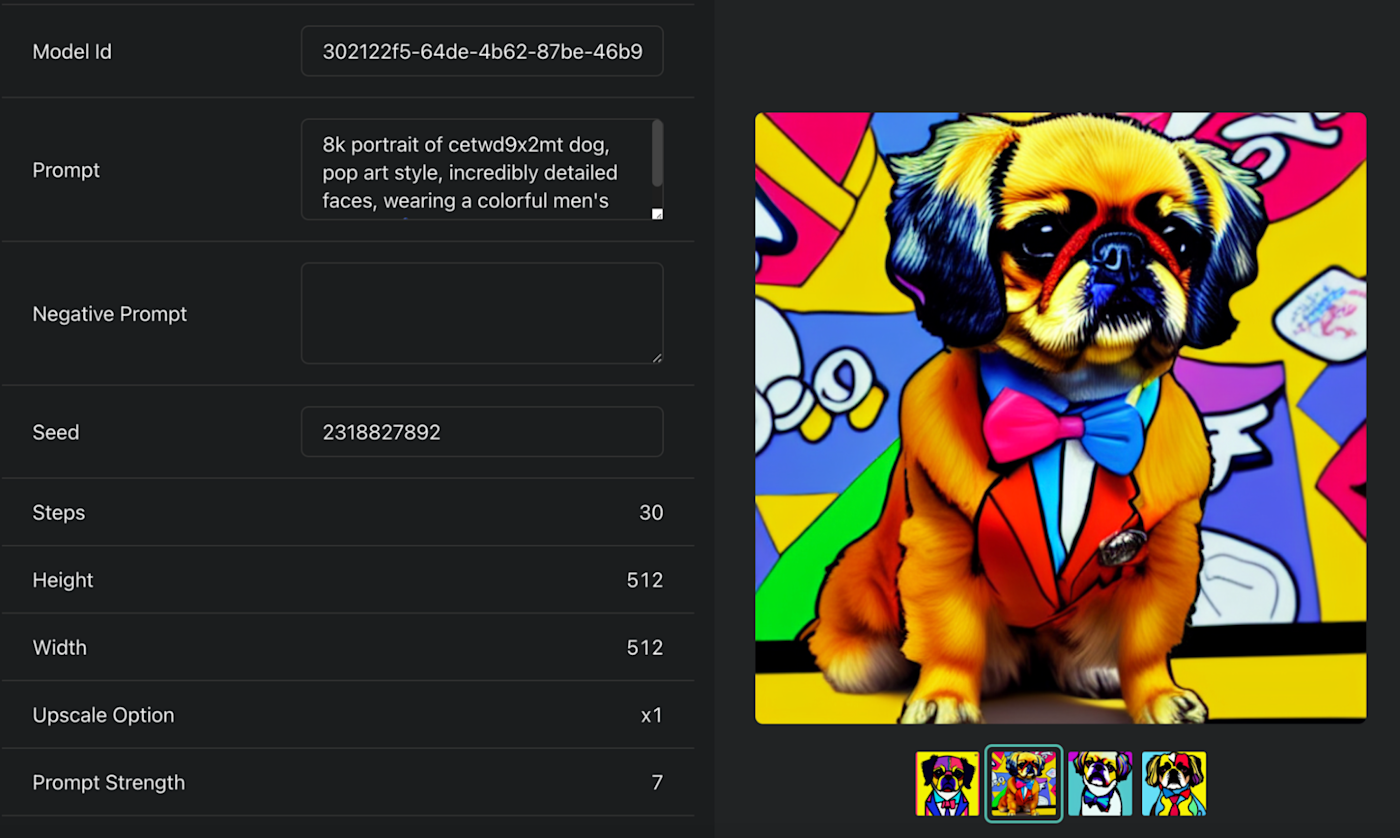
Using my keyword, my AI model takes the samples I fed it and creates something new. It's not perfect (I see a pug instead of a Pekingese in a few), but that's likely down to the prompt not being detailed enough. Test out your prompts with different styles (and use cases) until you settle on what you're after.
For example, here's a more "professional" portrait of @dog for his LinkedIn profile.

You can do the same with your own photographs (I guess it makes more sense for humans?).
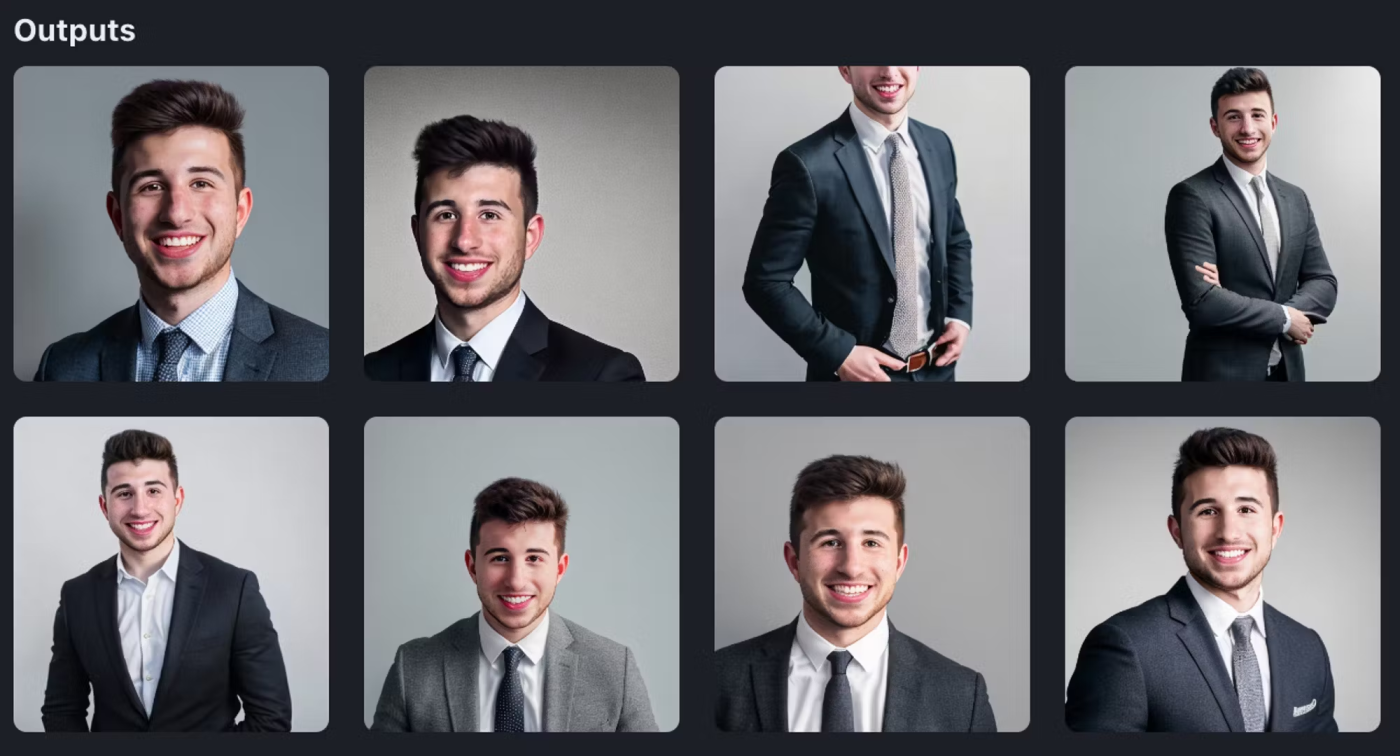
This is particularly handy if you have your headshot—but want AI to add in the professional attire (and poses). If you're curious about which prompts you should be using to generate the best avatars, check out Leap AI's guide for specifics.
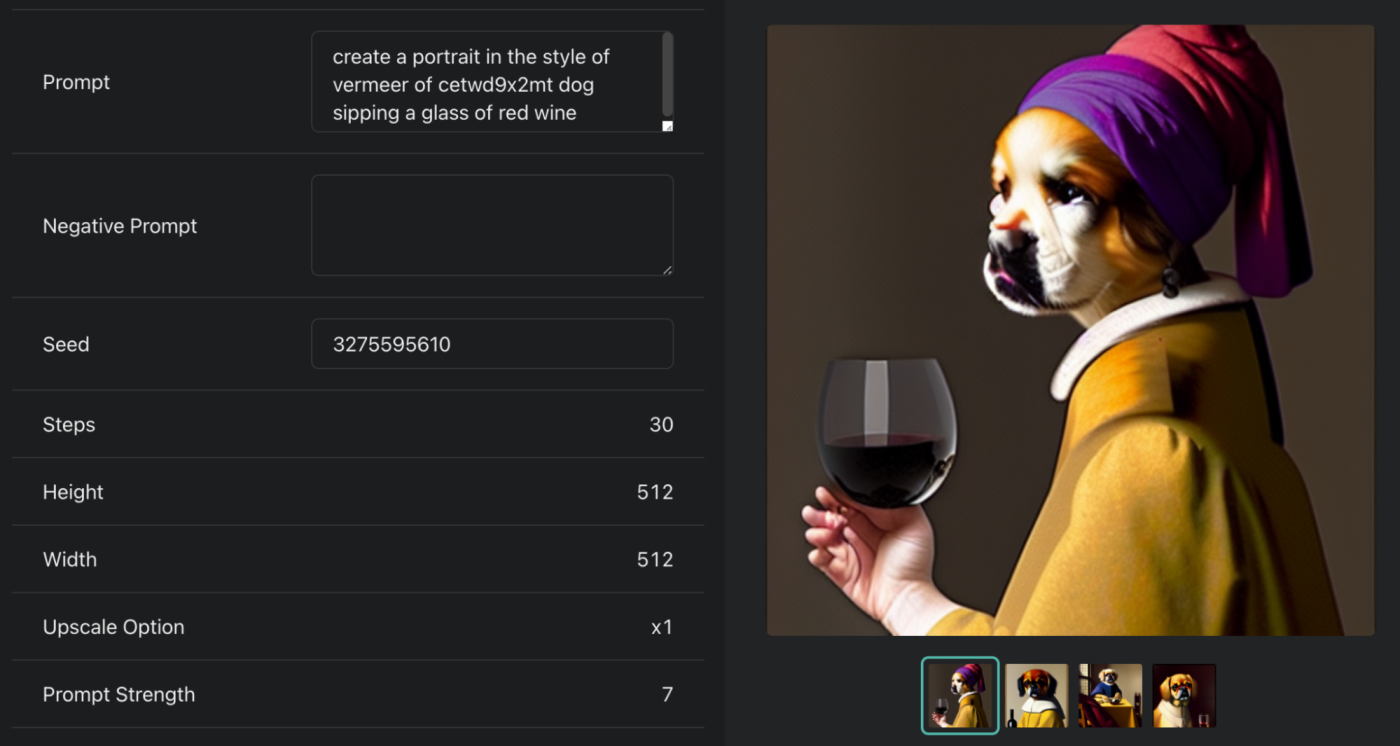
Here's an example I pulled from that guide, so you can see how creative you can get.
Or if you're into anime, you can add a few Ghibli elements.
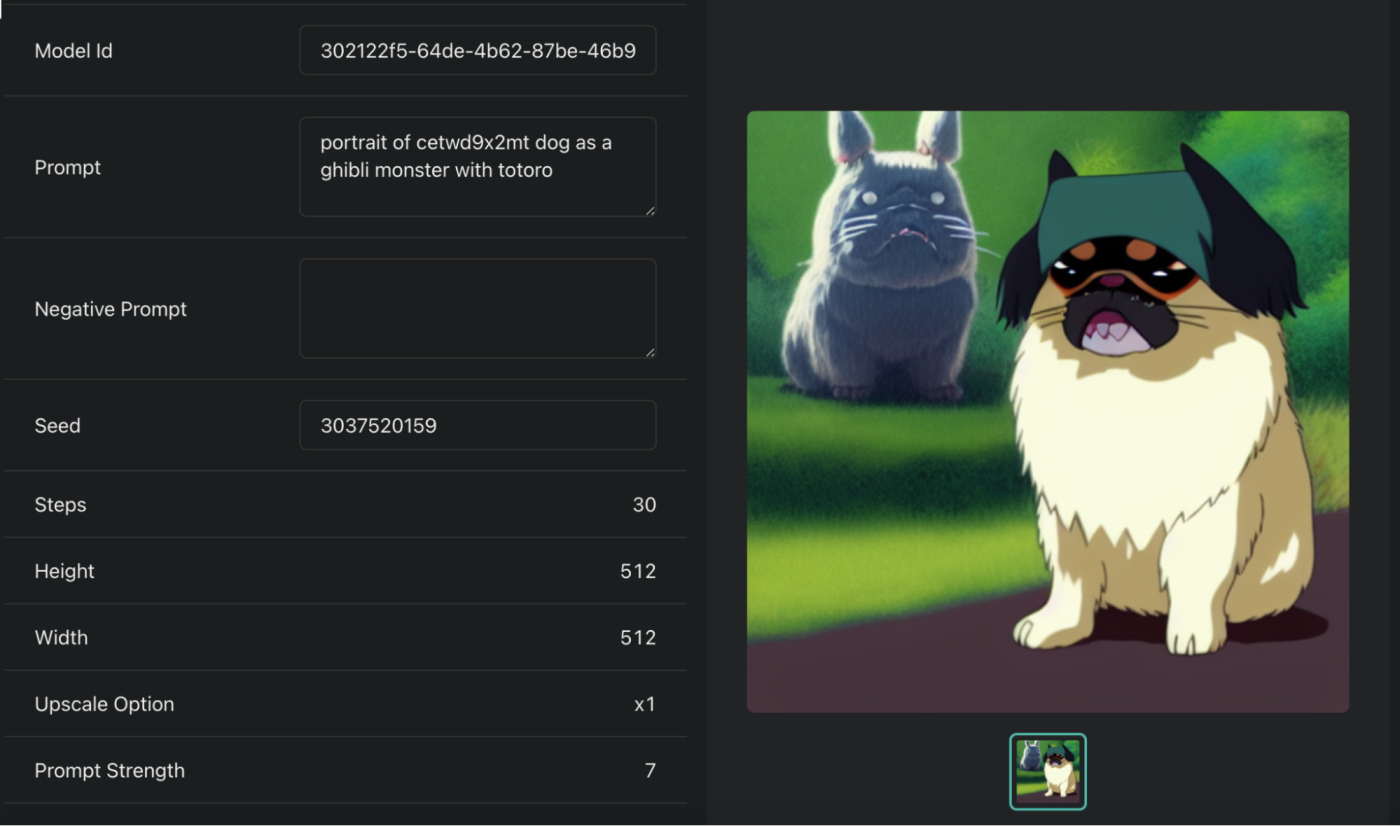
To be perfectly clear, you'll probably have to test it out a few times, as some results were just plain bizarre.
While it's fun to train these models on yourself and whatever pets you have, you can also use Leap AI for more work-related use cases. Here are a few ideas:
Create logos, hero images, or email designs based on a style you upload. By training a model based on a specific company's assets, you could create frames of reference for your design team that are infused with your brand. Note: Leap AI won't create a polished result—this would be more for inspiration.
Create artistic characters based on real people. You can use Leap AI to create fictional characters based on real people, replete with backgrounds. You could use it to create avatars for social media, generate illustrations for books or comics, or even develop characters for video games.
Design products. Leap AI can also be used as a starting point when designing products. For example, product teams could leverage their own dataset (think: specific cars or existing app designs) to create mockups or mood boards that serve as inspiration.
I will say that the experience of generating images, fine-tuning your own models, and creating avatars with Leap AI is probably best done through their server-side SDK—and it has added features you can't use the browser for (like the ability to edit AI-generated images). This does mean using code—though they have clear-cut guides to help you through.
Do more with Leap AI
Leap AI is great fun to use directly in the web browser, but it also connects to Zapier, so you can create AI-generated images (or brand new models) as part of your business workflows. With it, you can do things like automatically post new images to a Slack channel or directly upload images from Gmail to Leap AI—or any other apps you use.
Post new images generated in Leap AI to Slack channel messages
Generate images with Leap AI from new Gmail emails
Generate images in Leap AI from new Google Sheets rows
Zapier is a no-code automation tool that lets you connect your apps into automated workflows, so that every person and every business can move forward at growth speed. Learn more about how it works.
Related reading:
